Tillora
Point of sale and inventory for shops, cafés and restaurants, sold as your own SaaS.
Tillora is a complete web application. You install it once on your server; shop owners sign up on your website, pick a plan and run their business in it. You need no coding to run it: fill in a settings file, start it with one command, and an install wizard does the rest.
It has three parts:
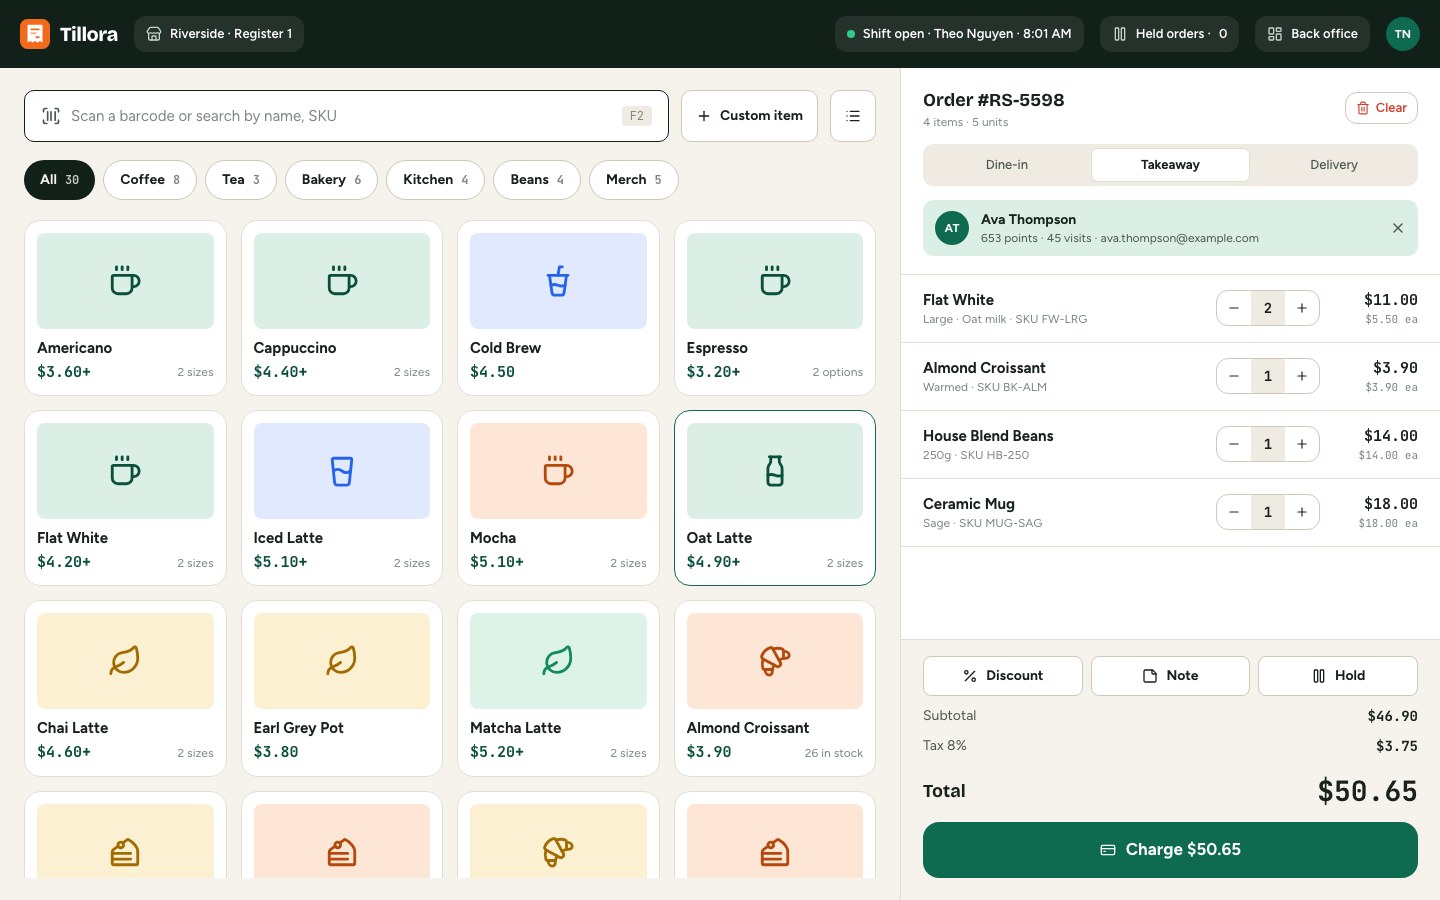
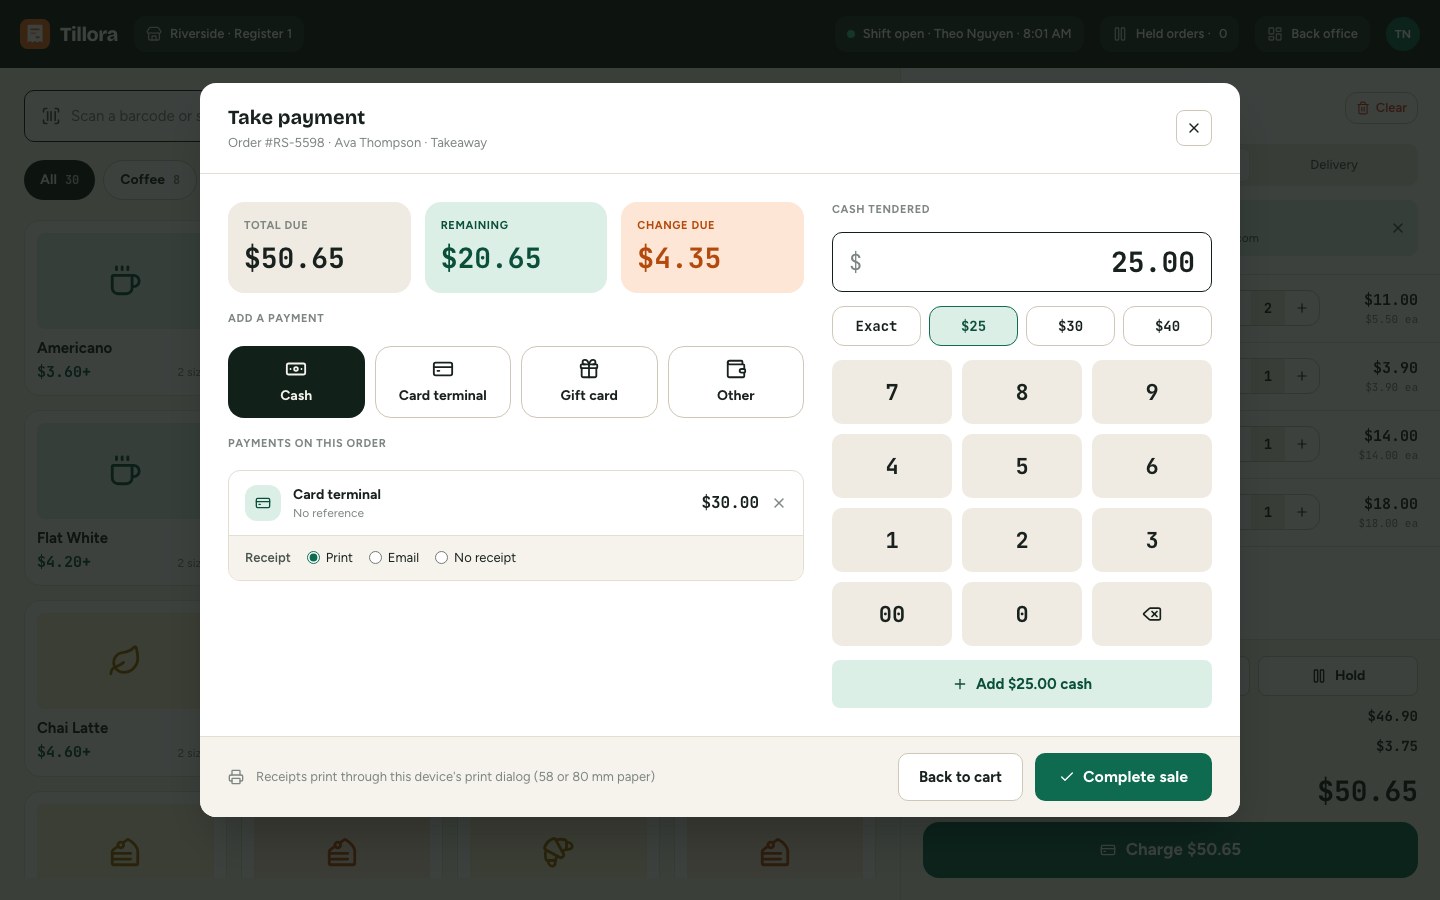
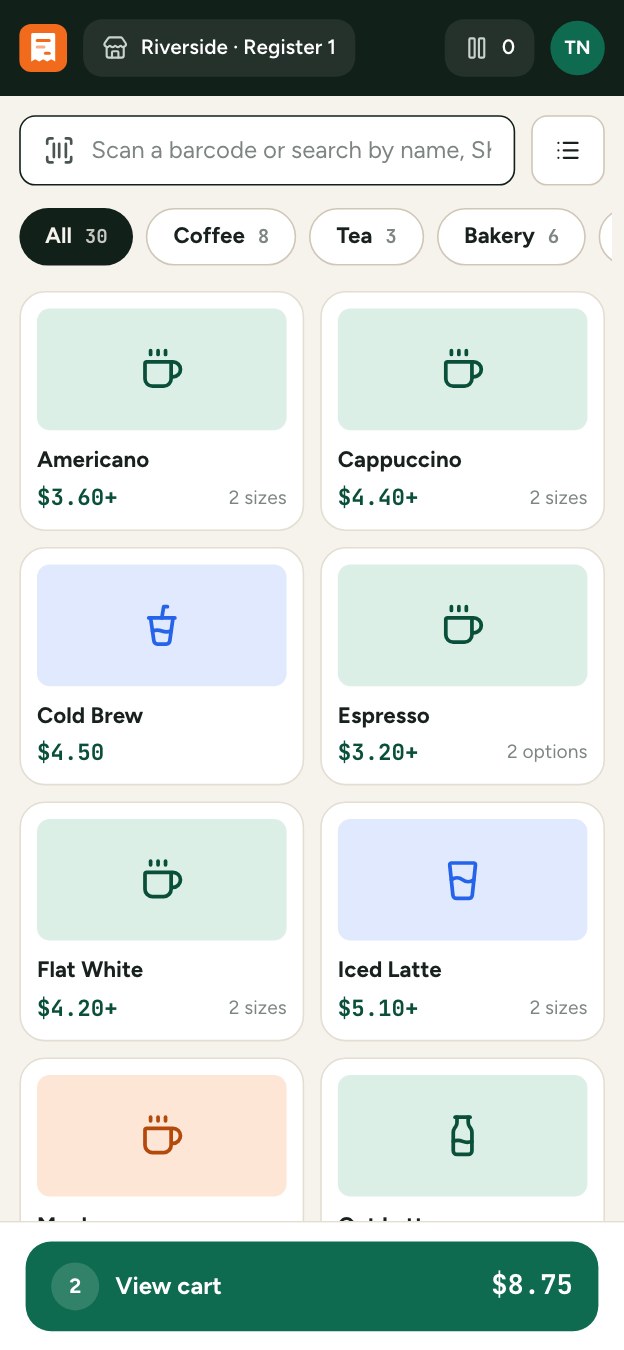
- The register (POS): a touch-friendly till for tablets, laptops and phones. Variants, add-ons, barcodes, discounts, split payments (cash, card terminal, gift card), held orders, dine-in tables, shifts with cash counts, printed and emailed receipts.
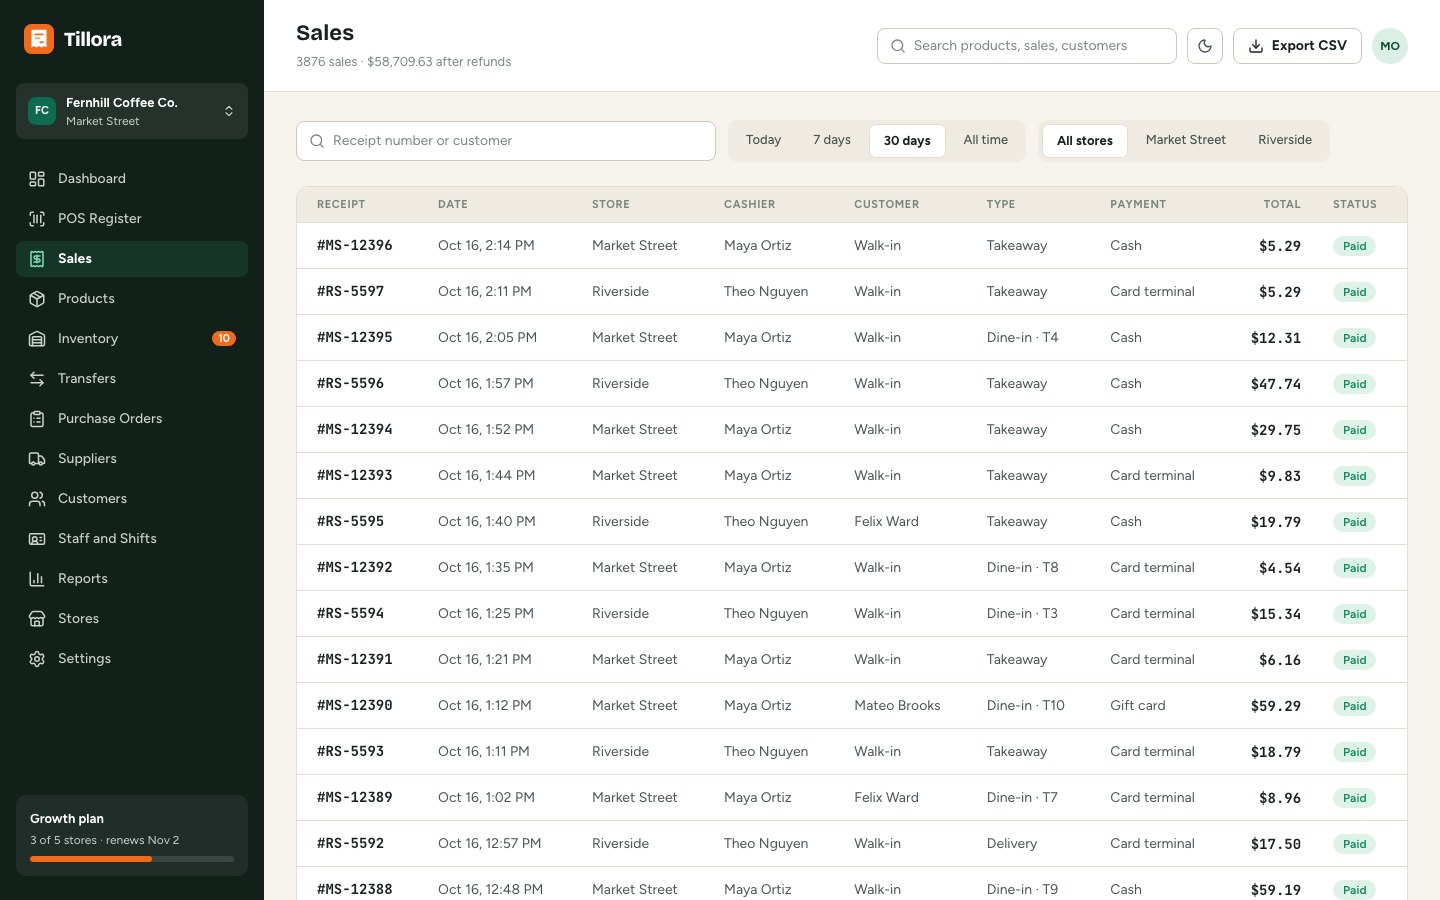
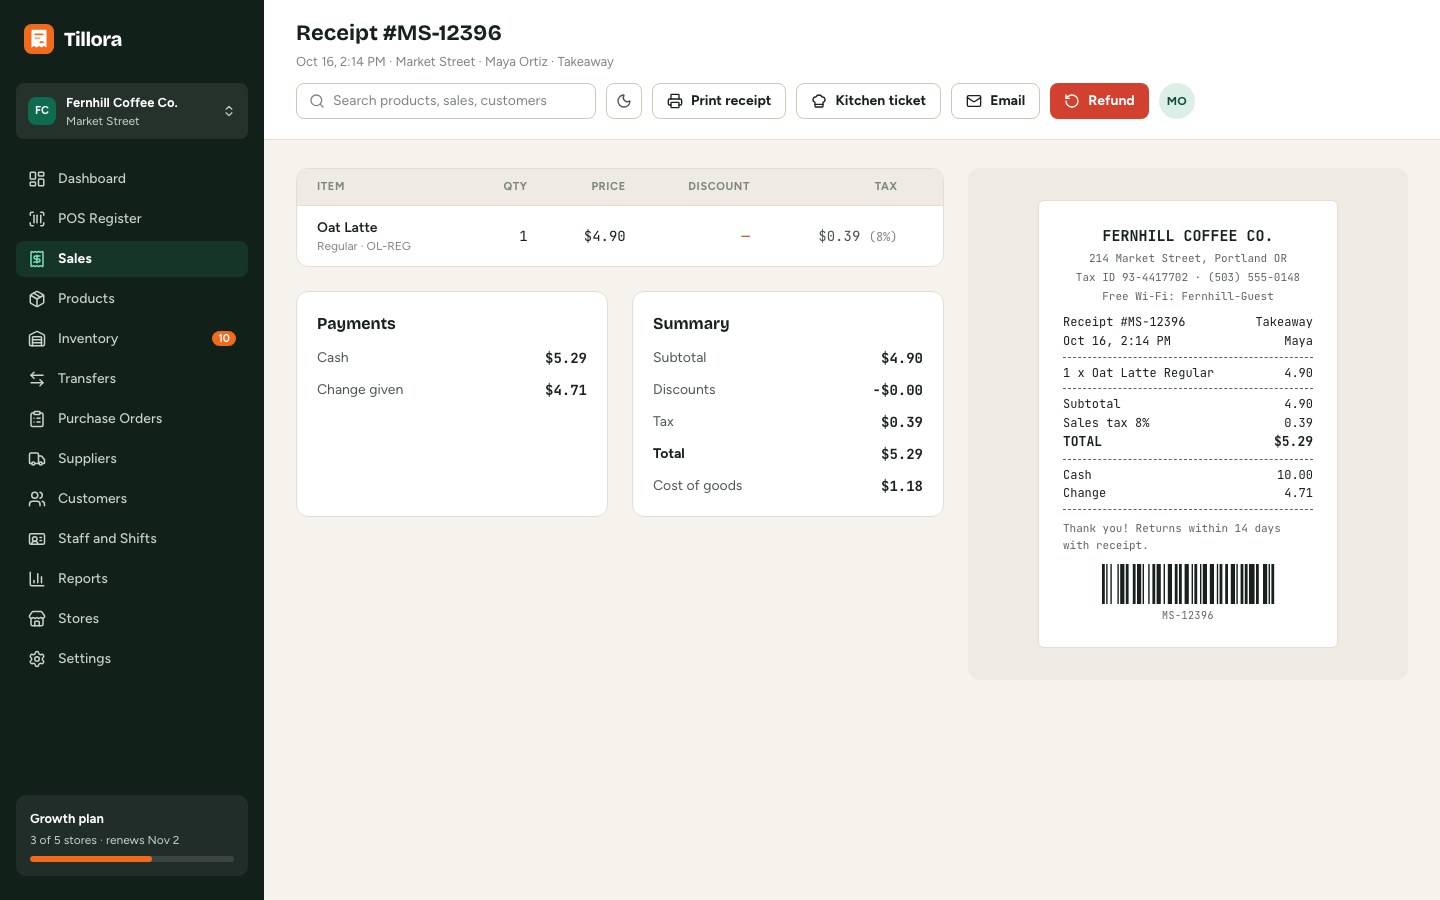
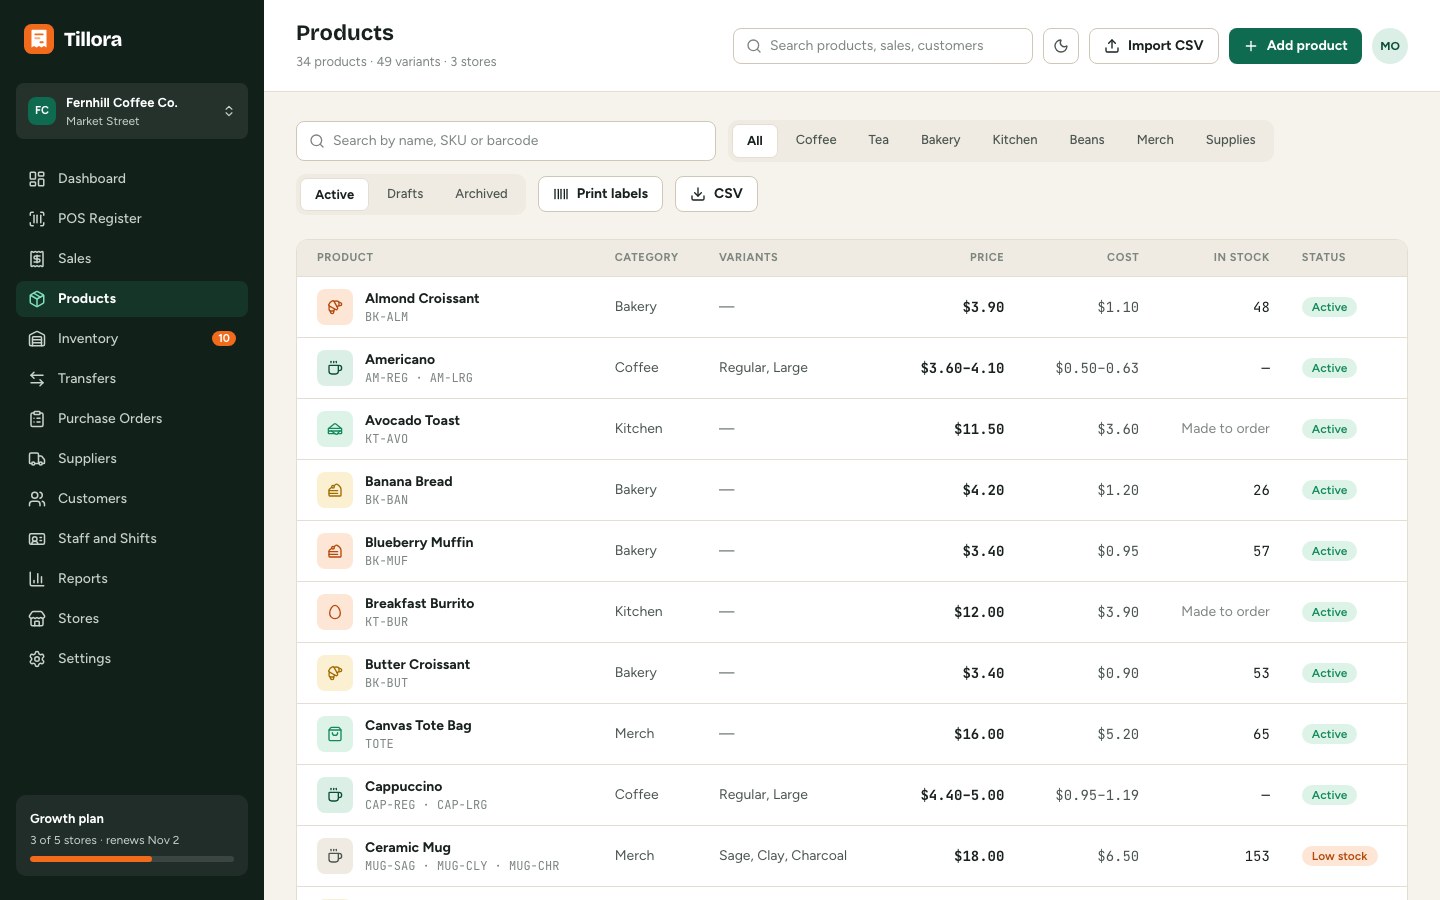
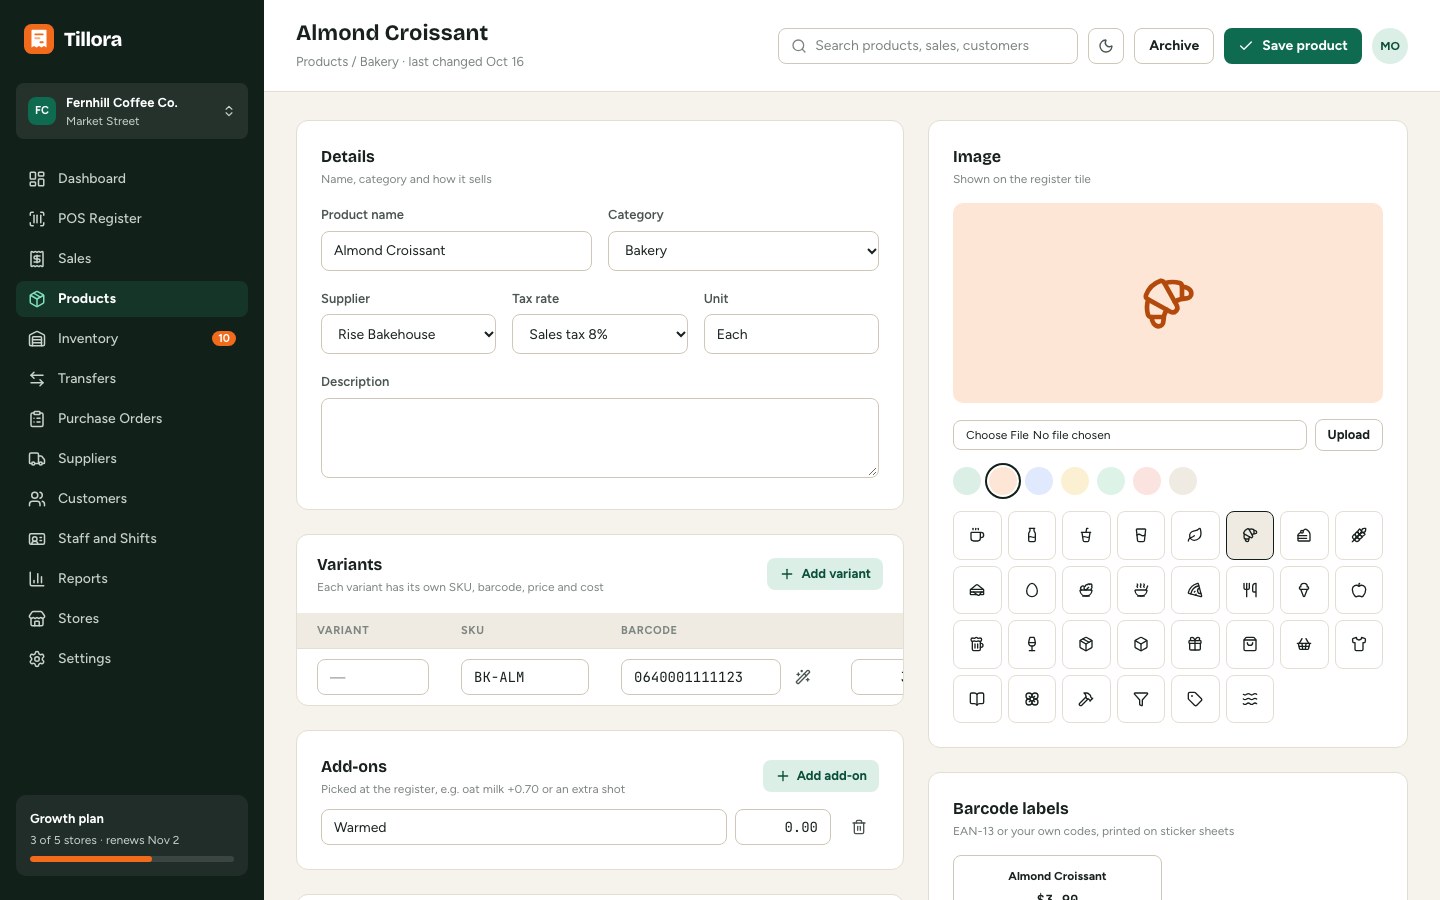
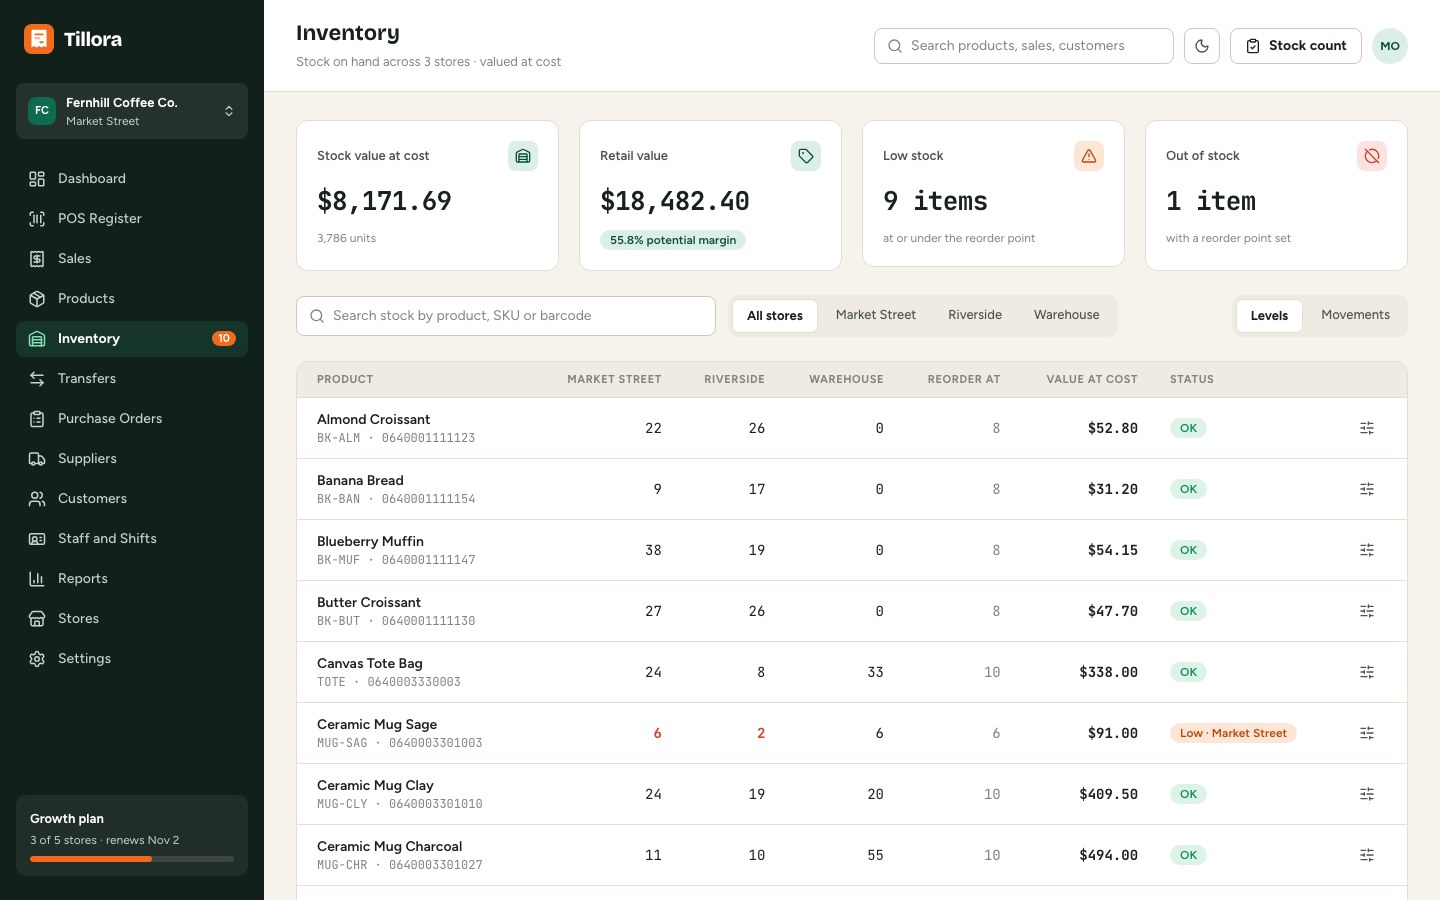
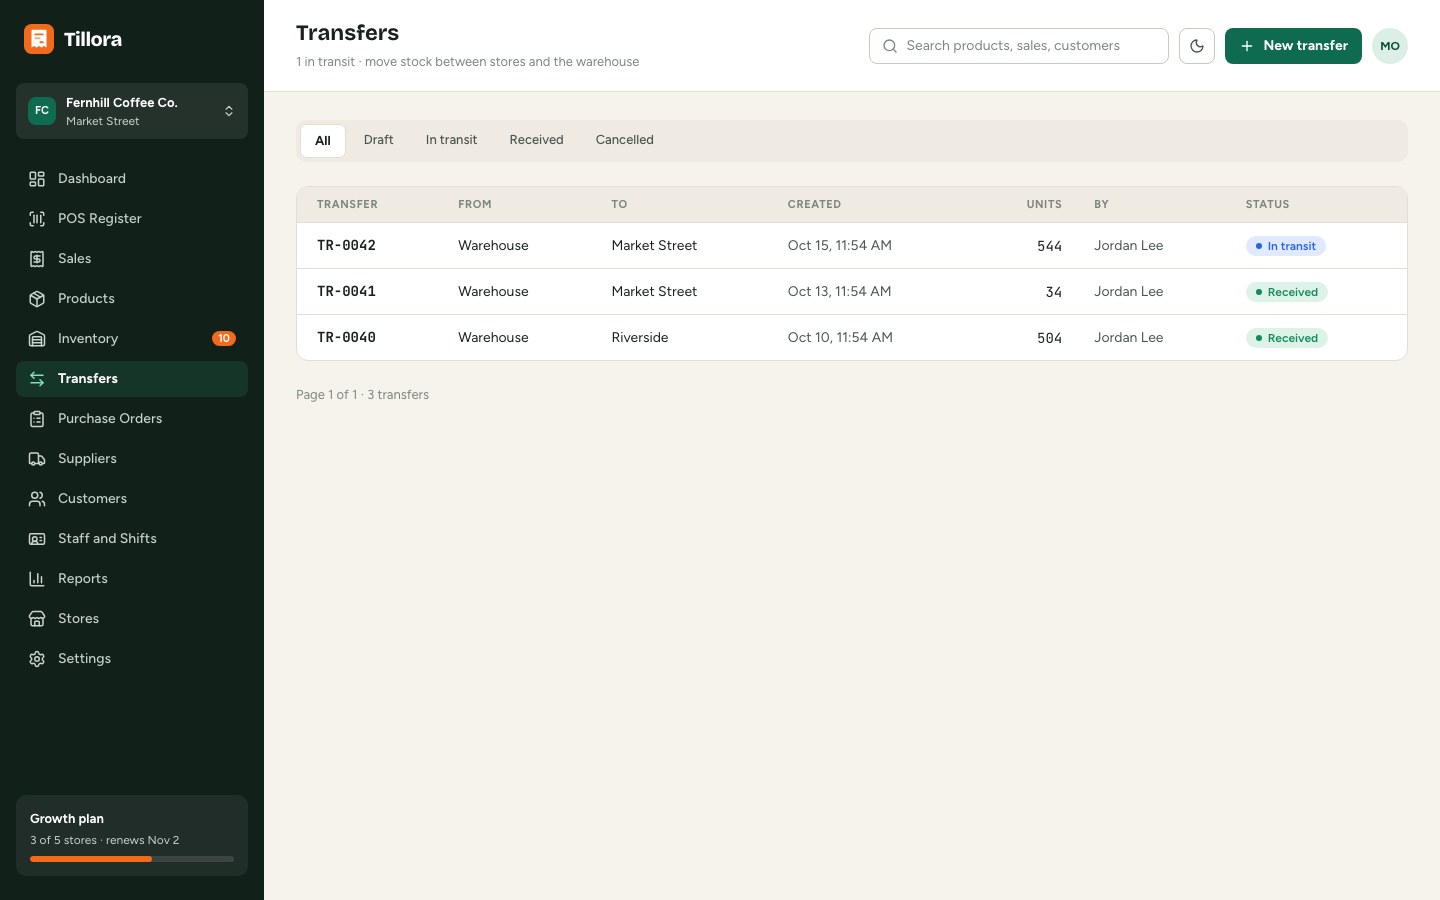
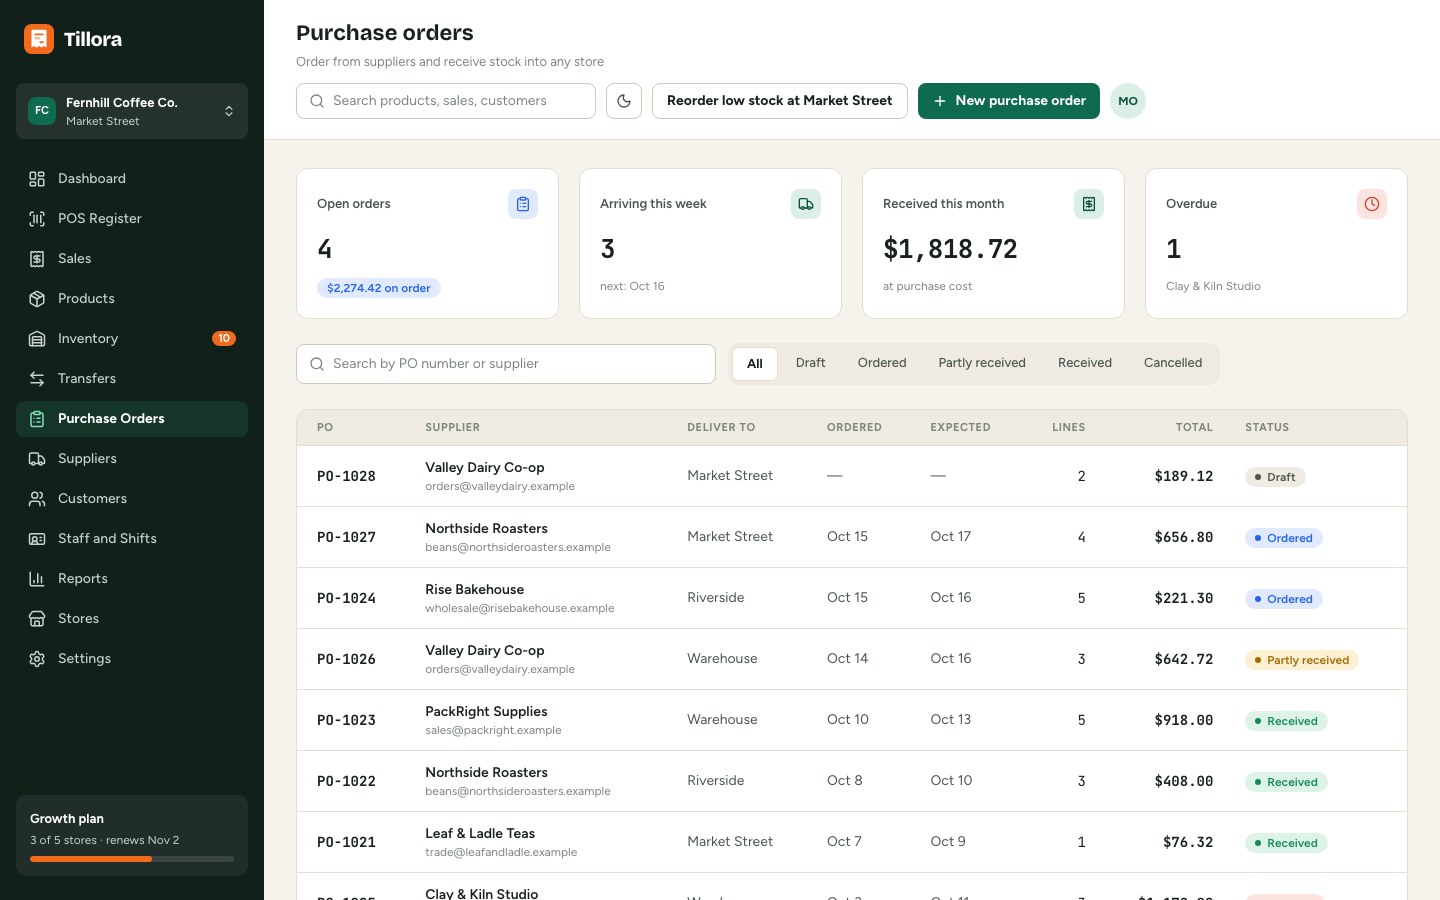
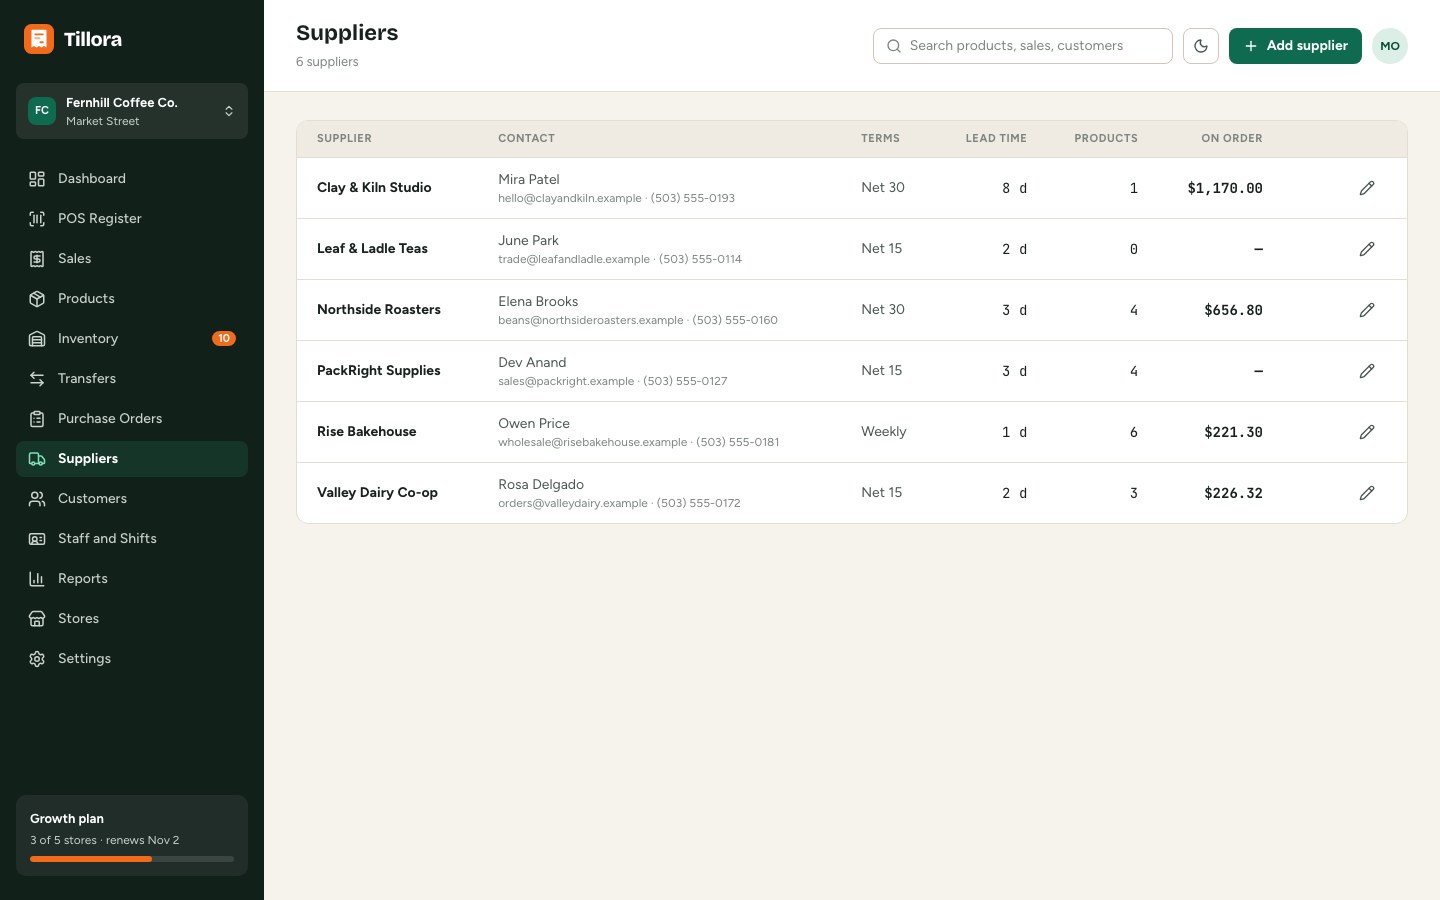
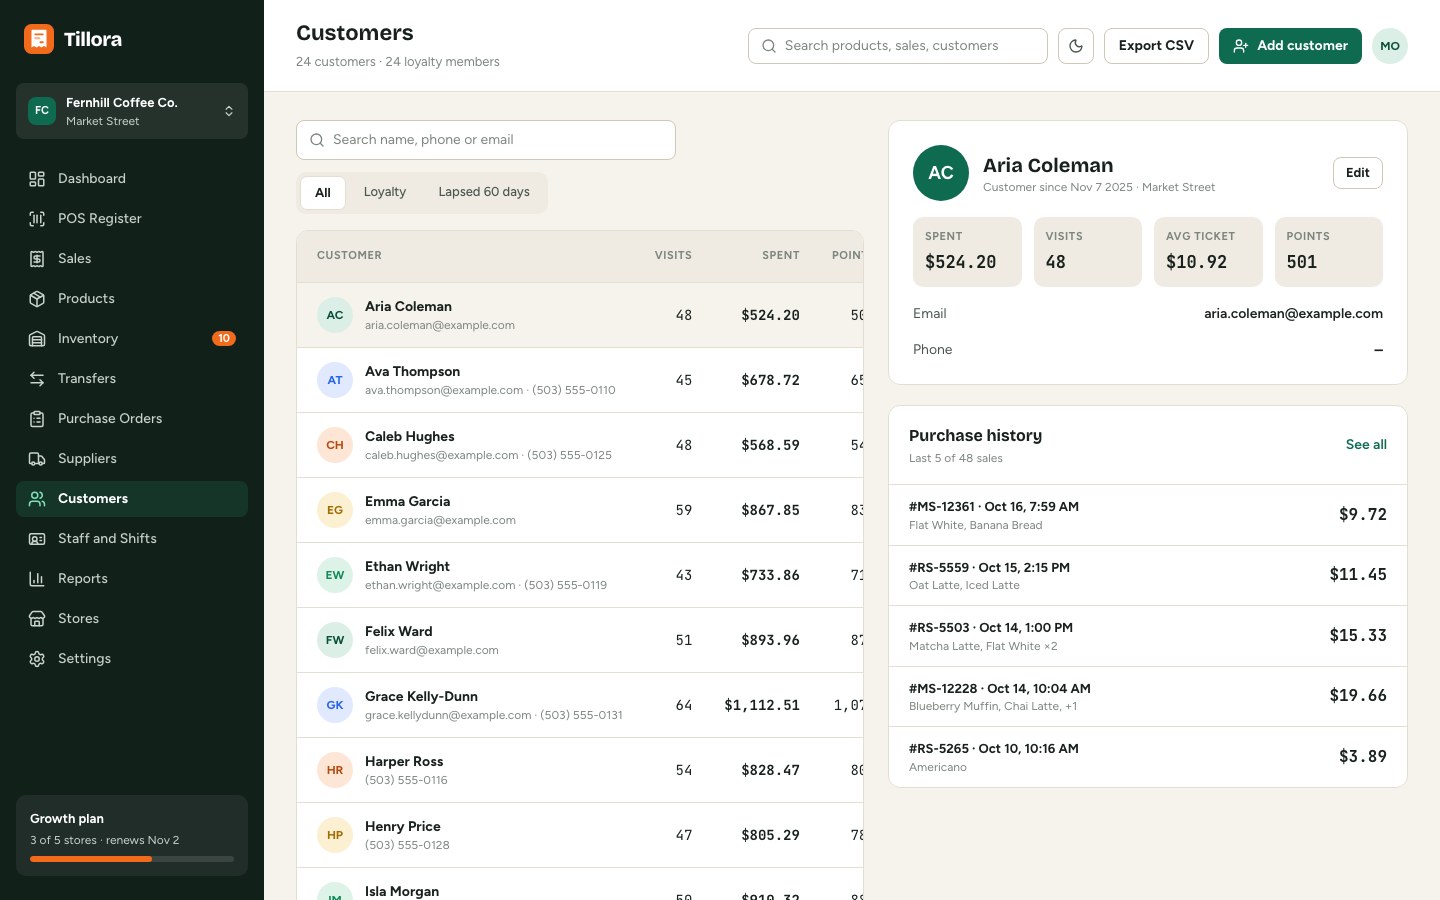
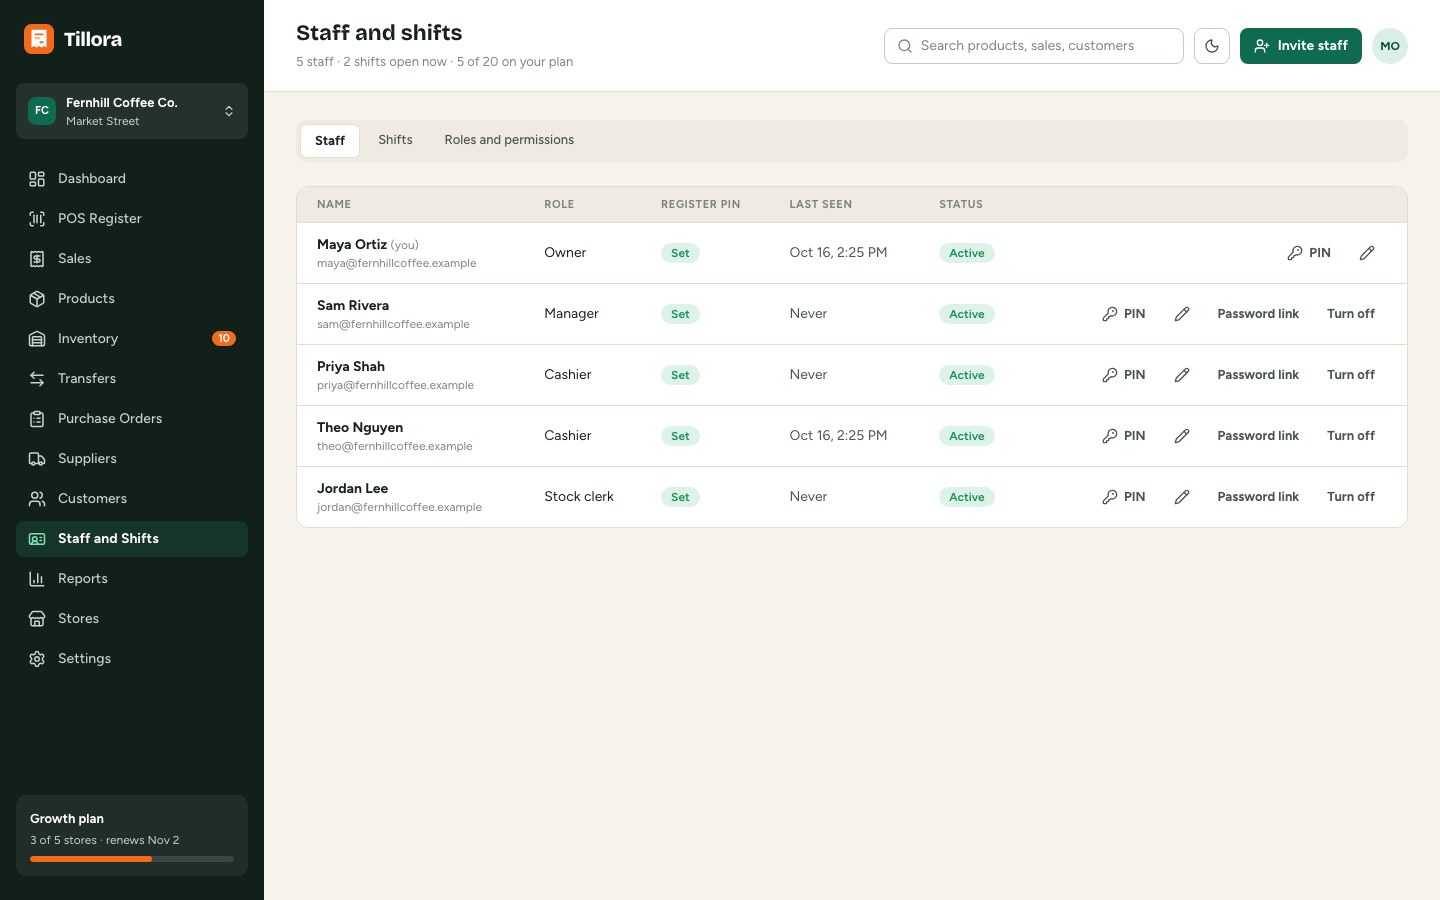
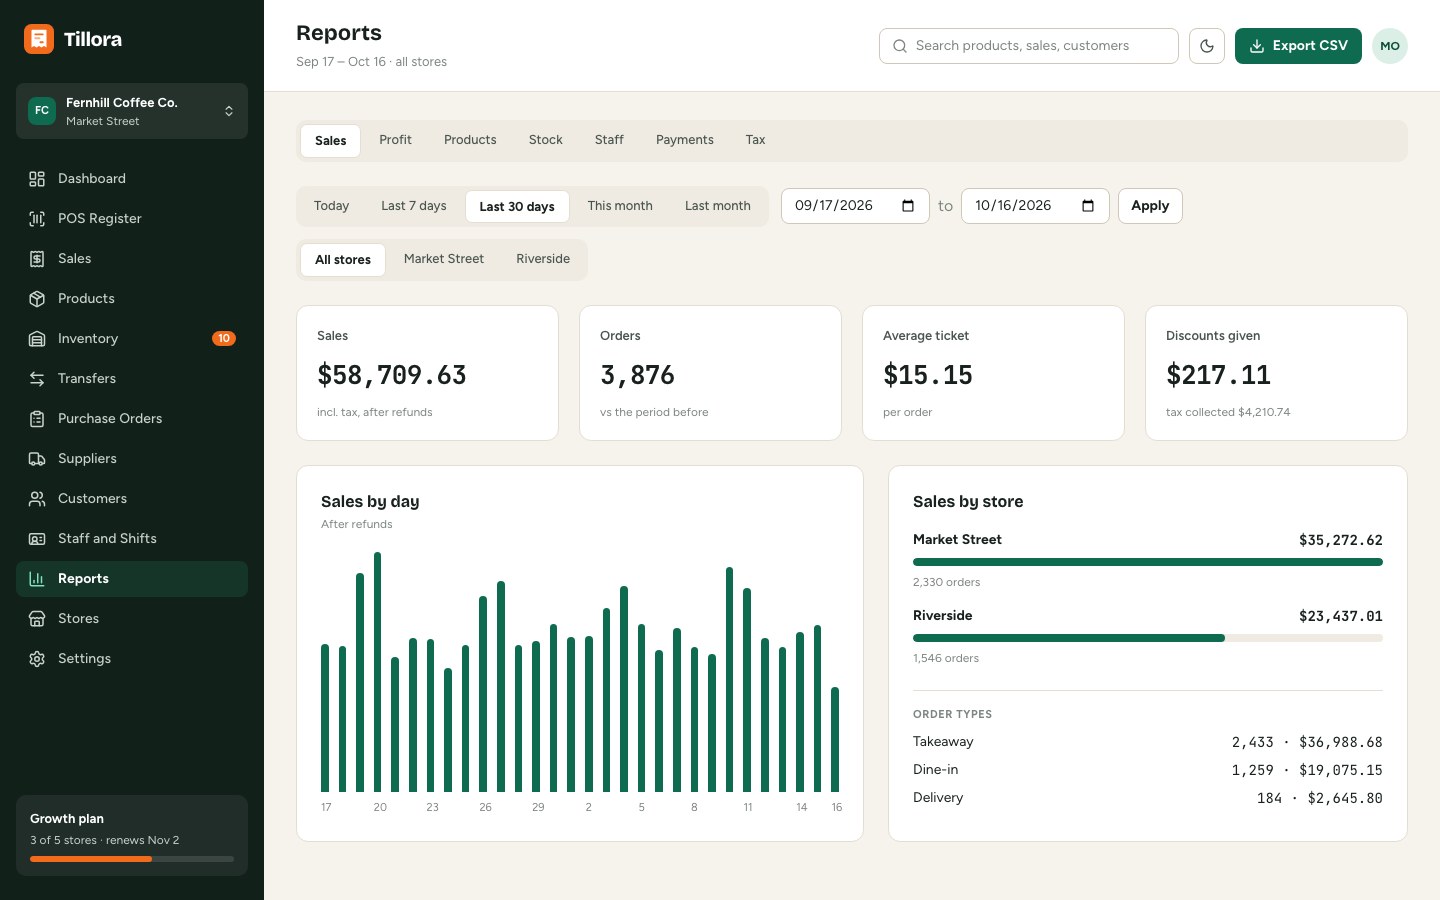
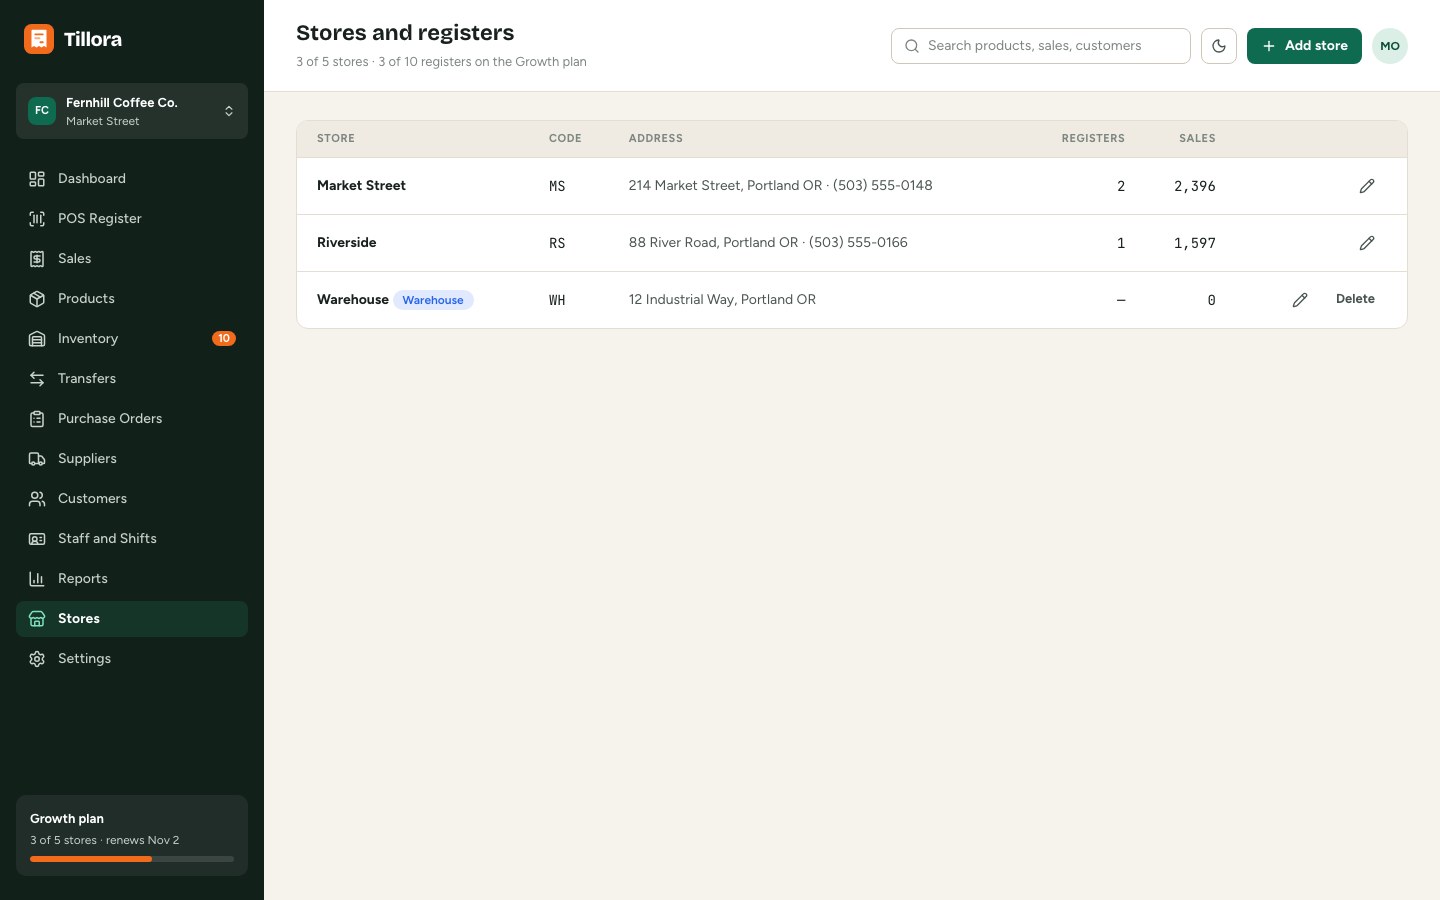
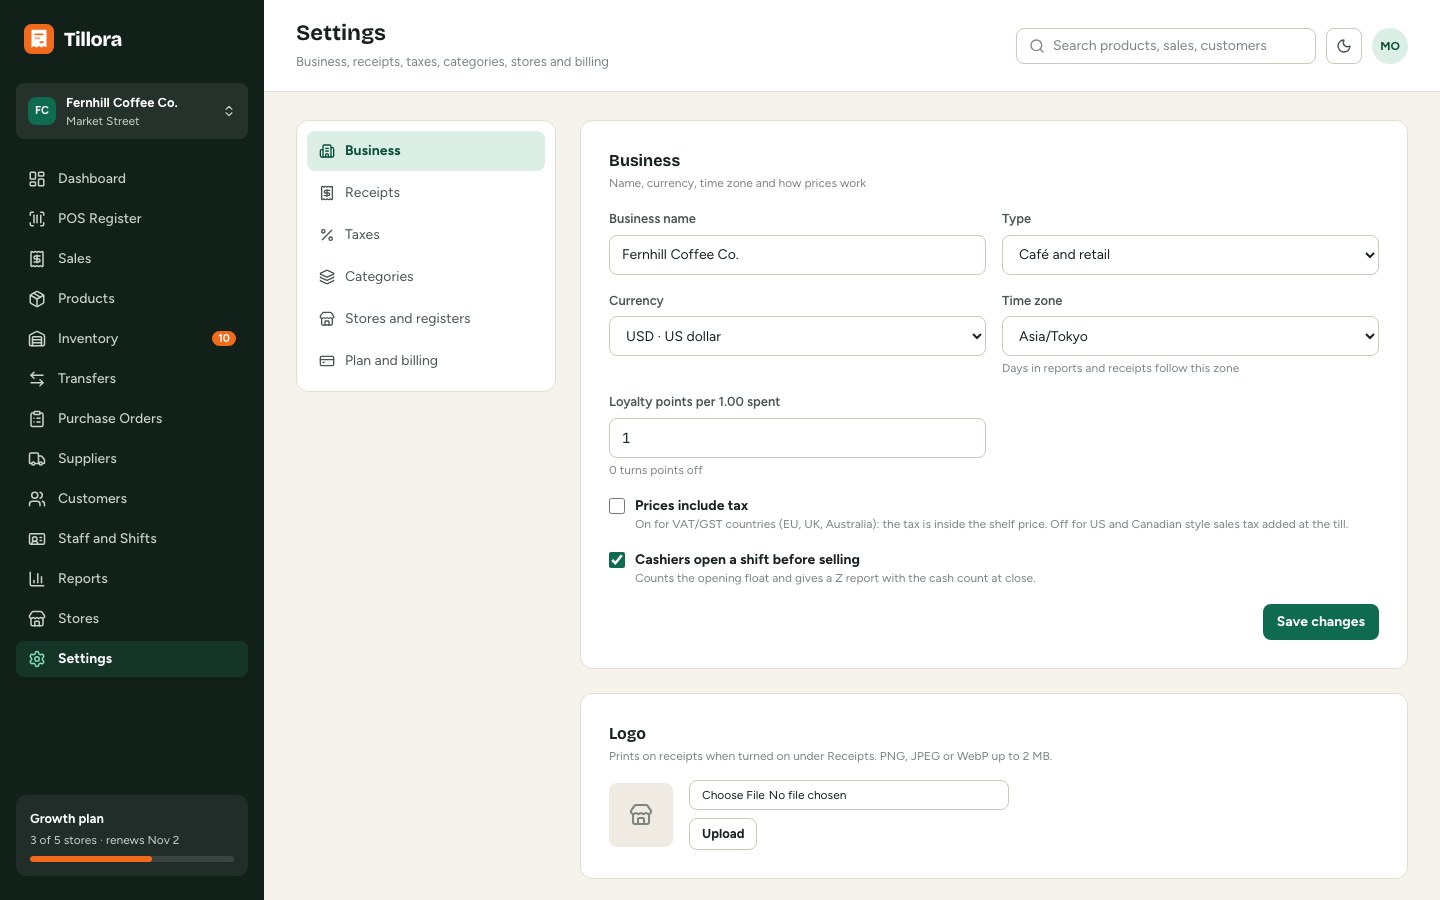
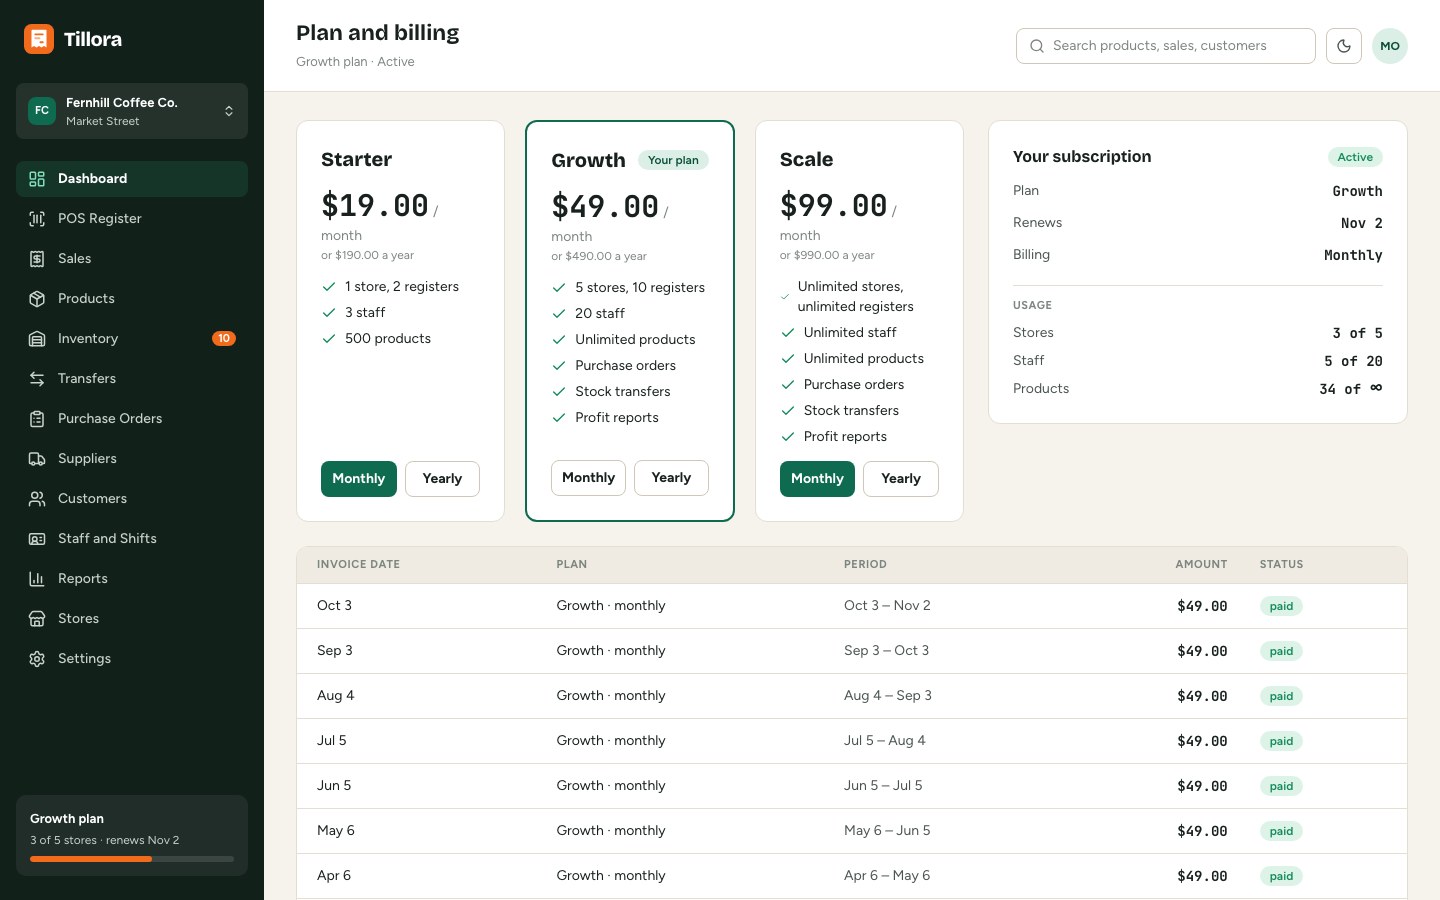
- The back office for each business: dashboard, sales and refunds, products with variants and barcodes, stock per store, counts, transfers, purchase orders, suppliers, customers with loyalty points, staff roles, PINs and shifts, reports, stores and settings.
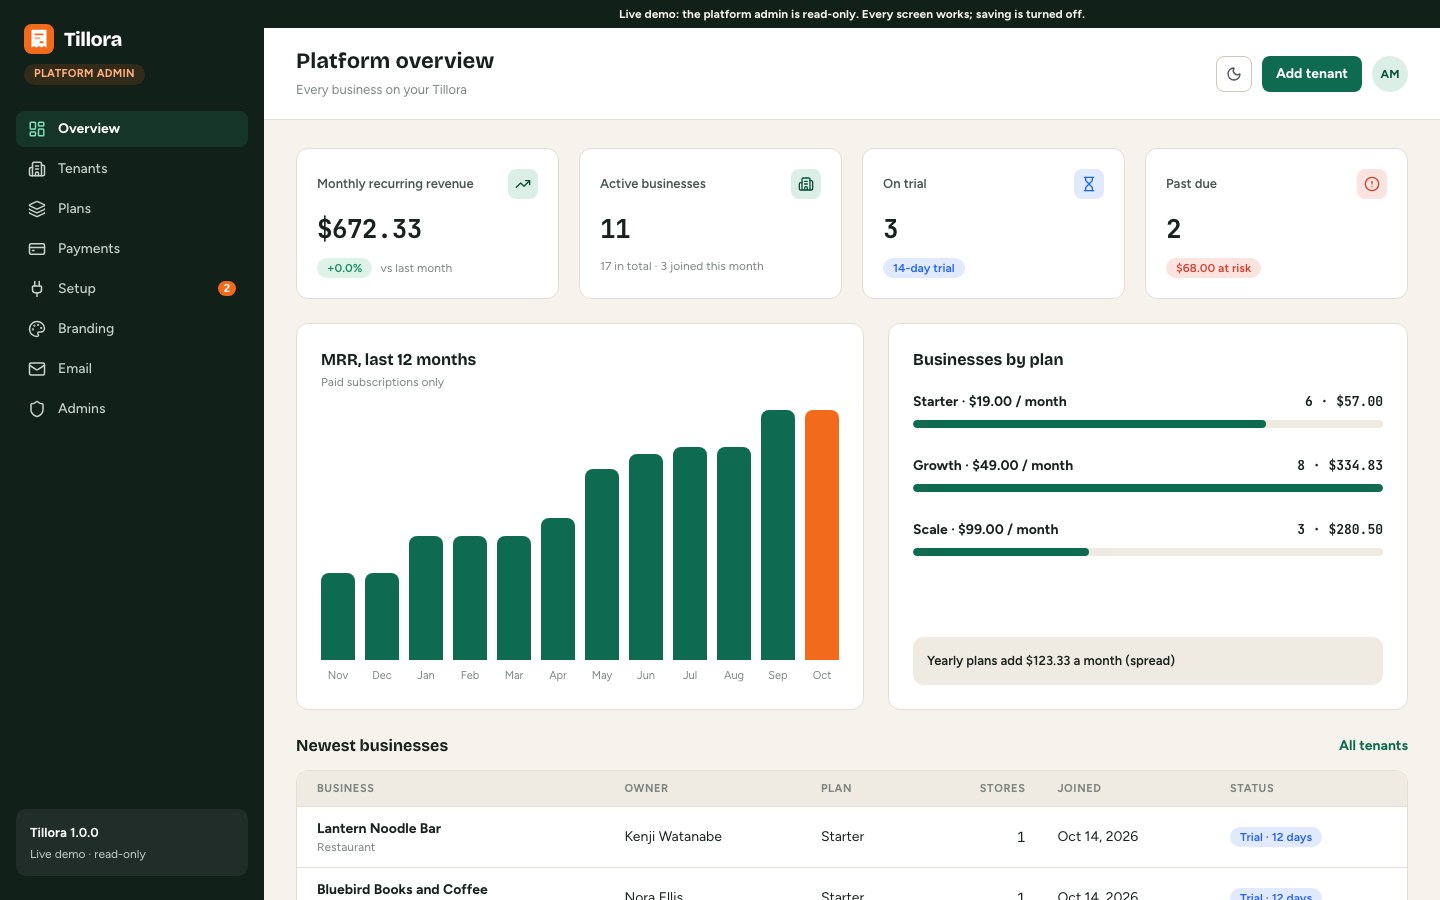
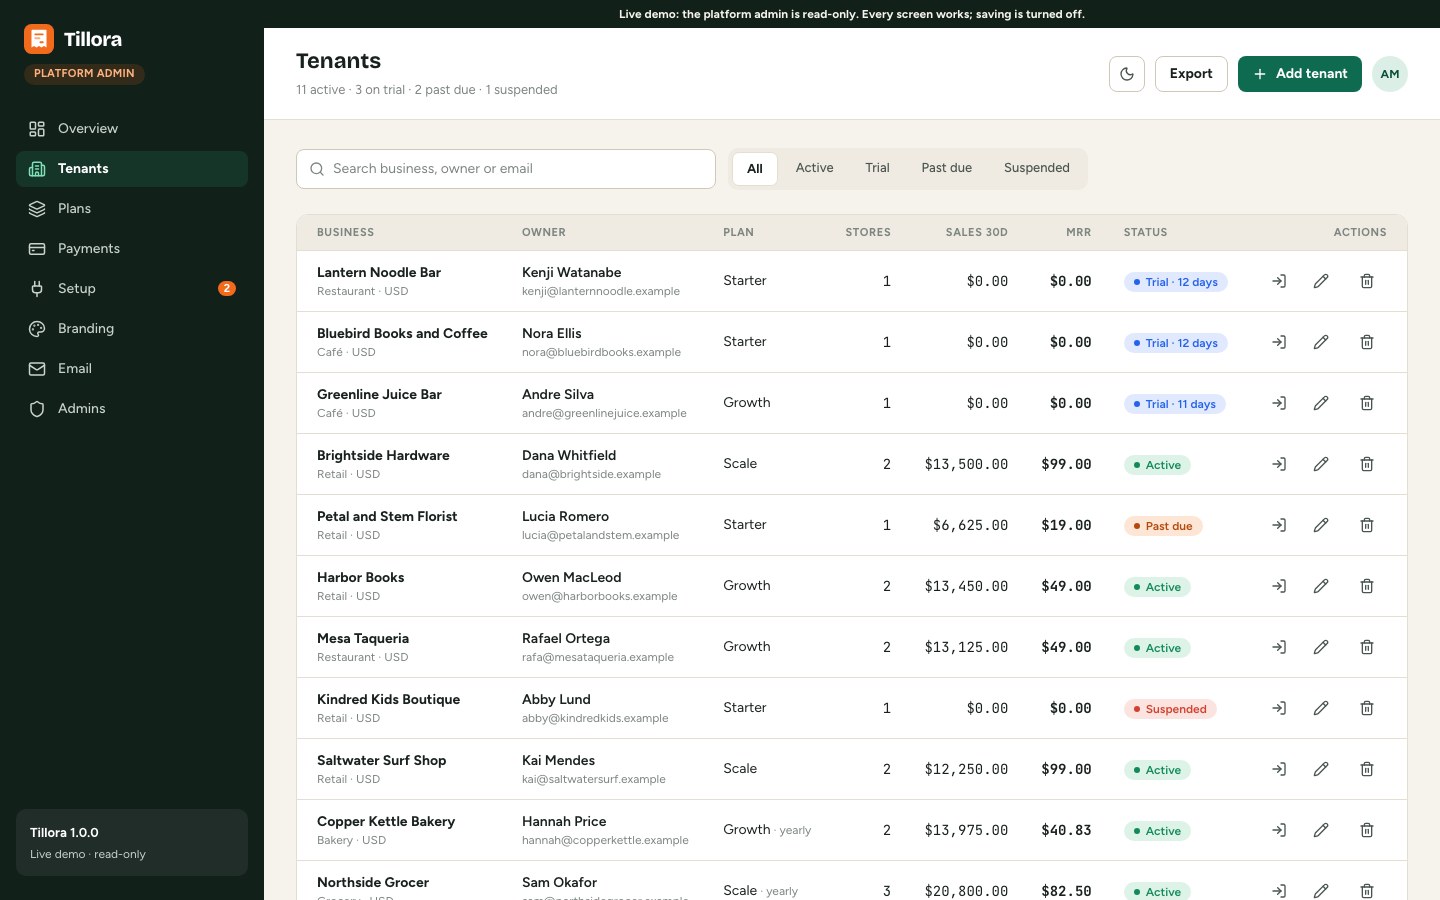
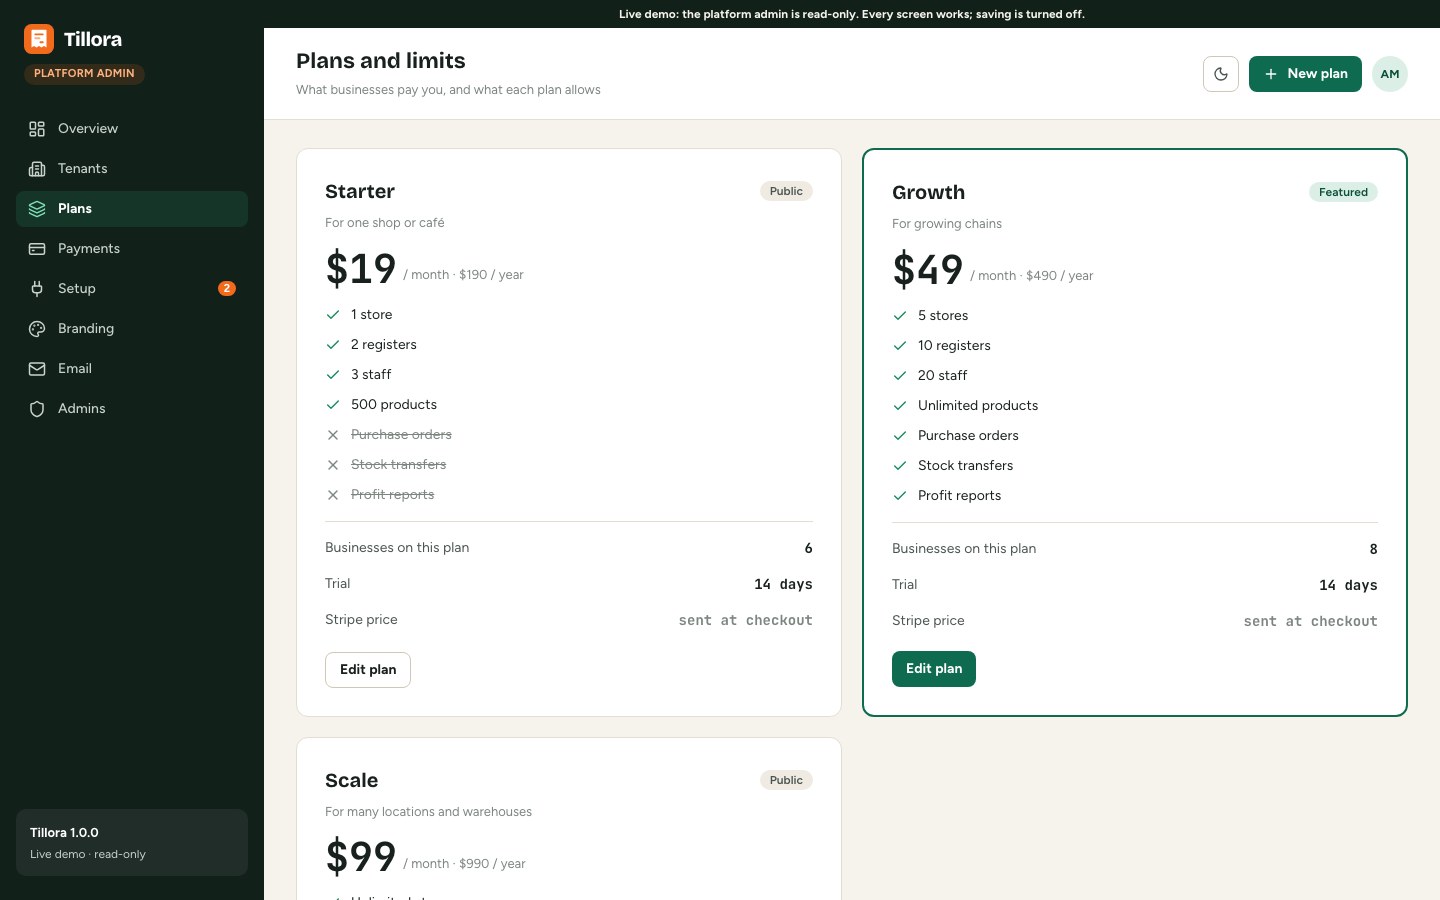
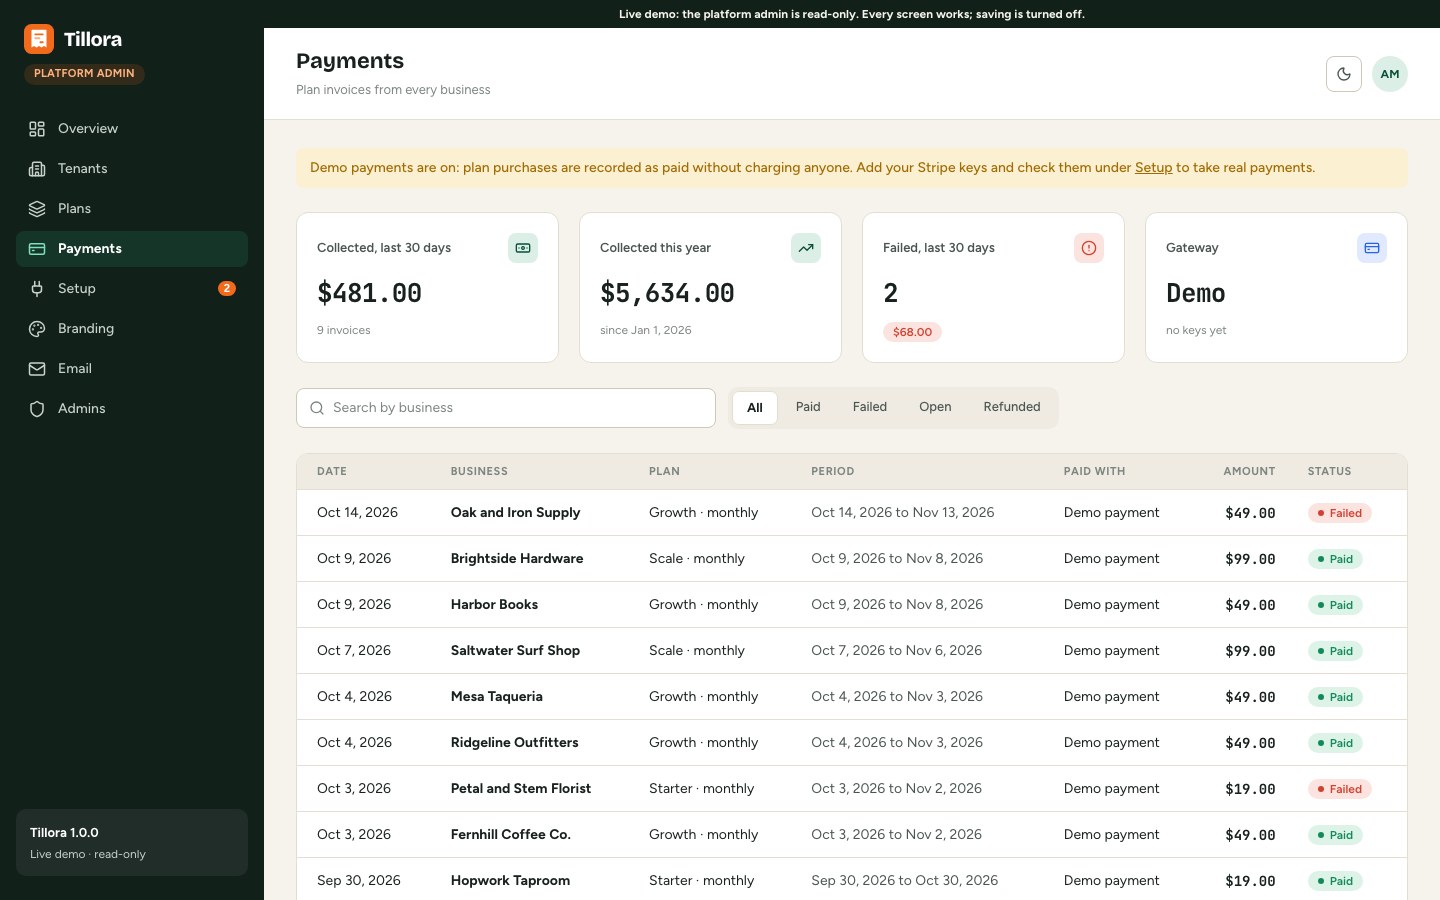
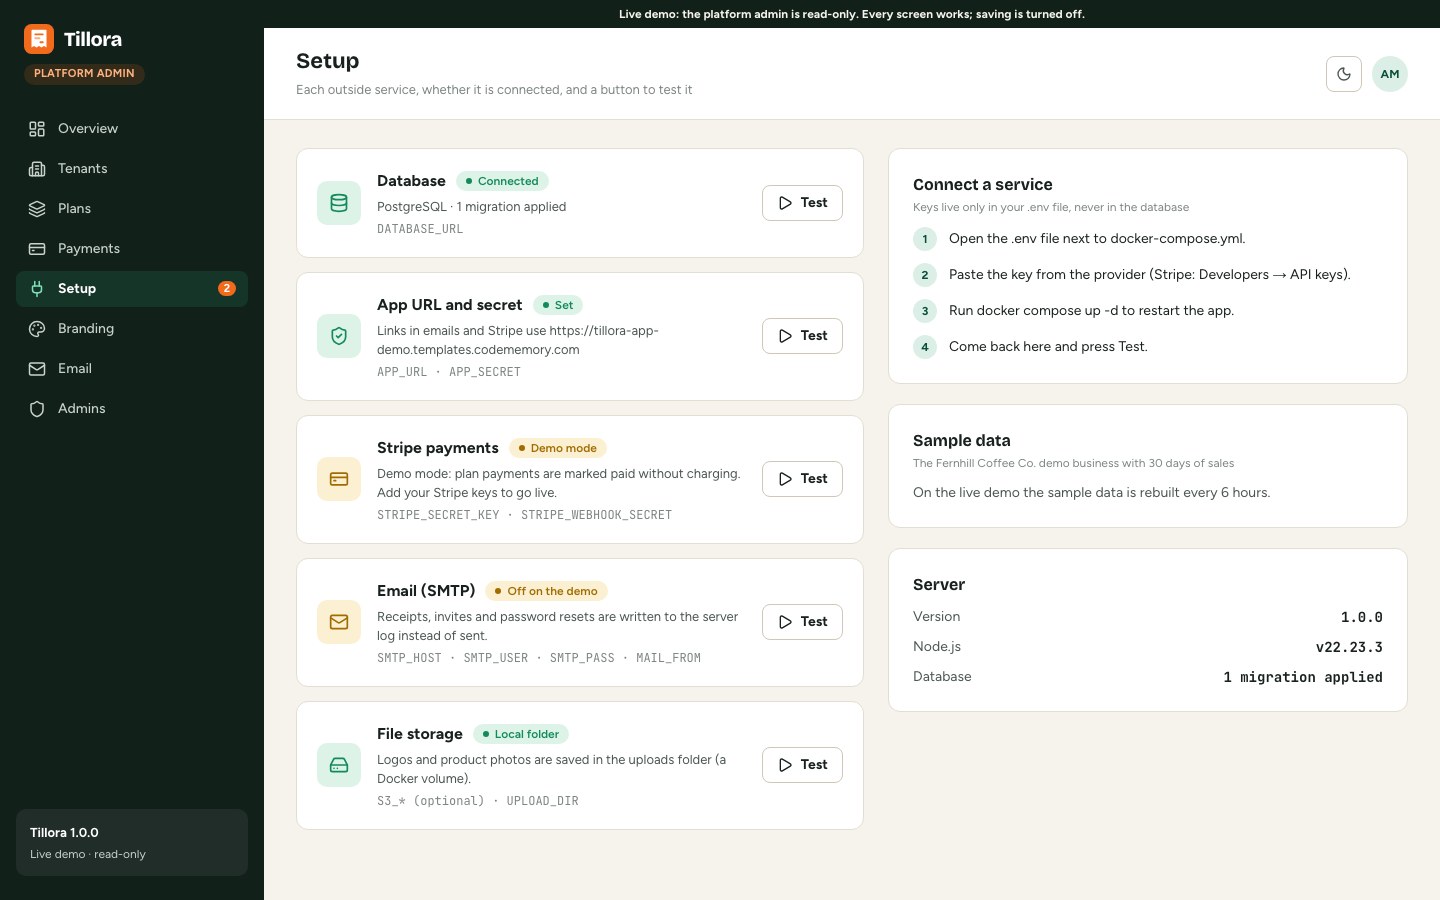
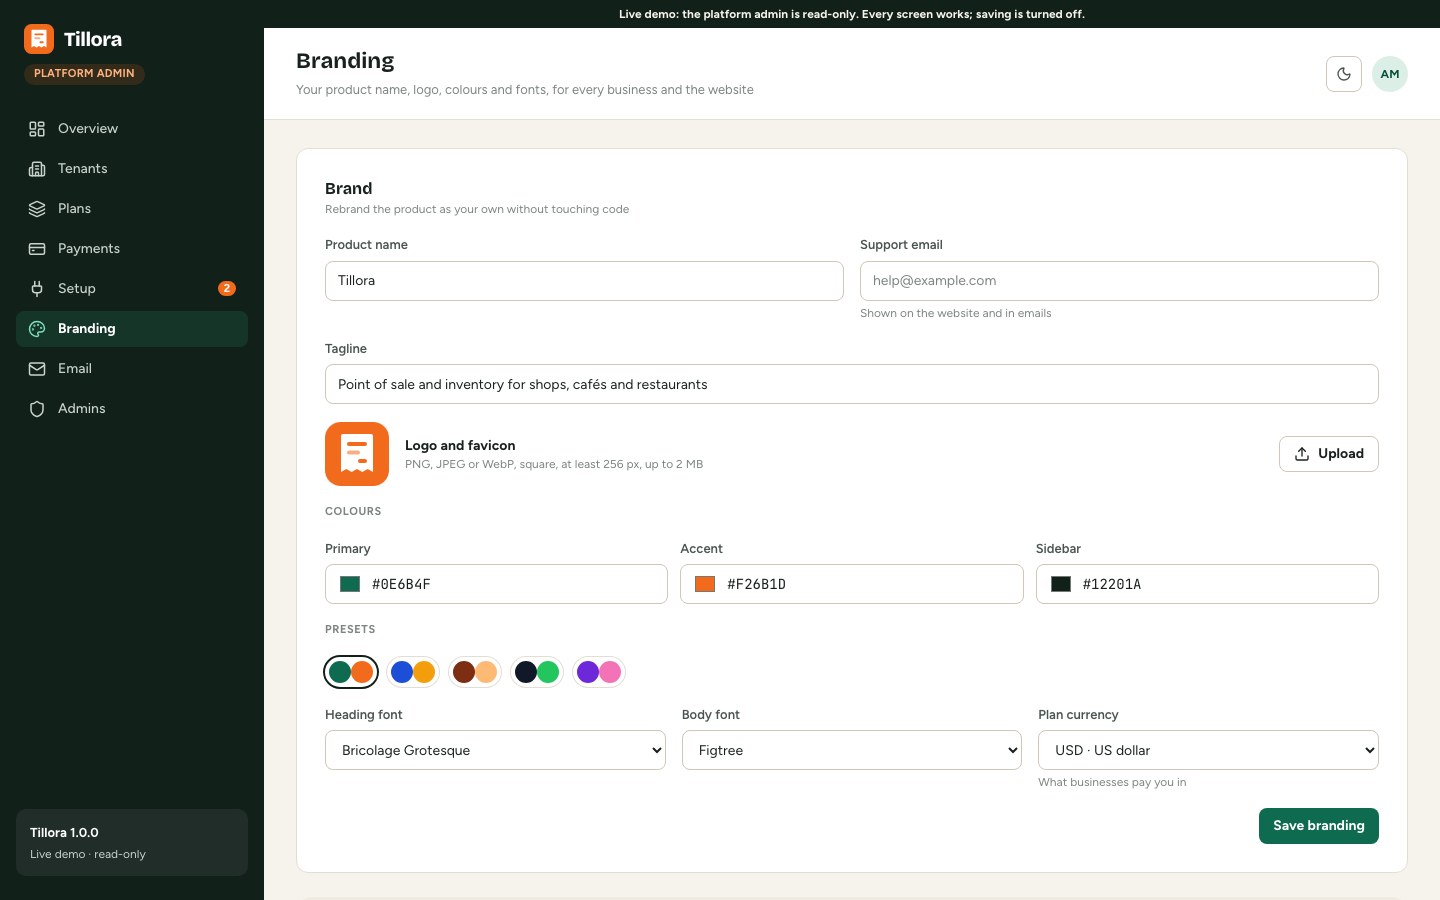
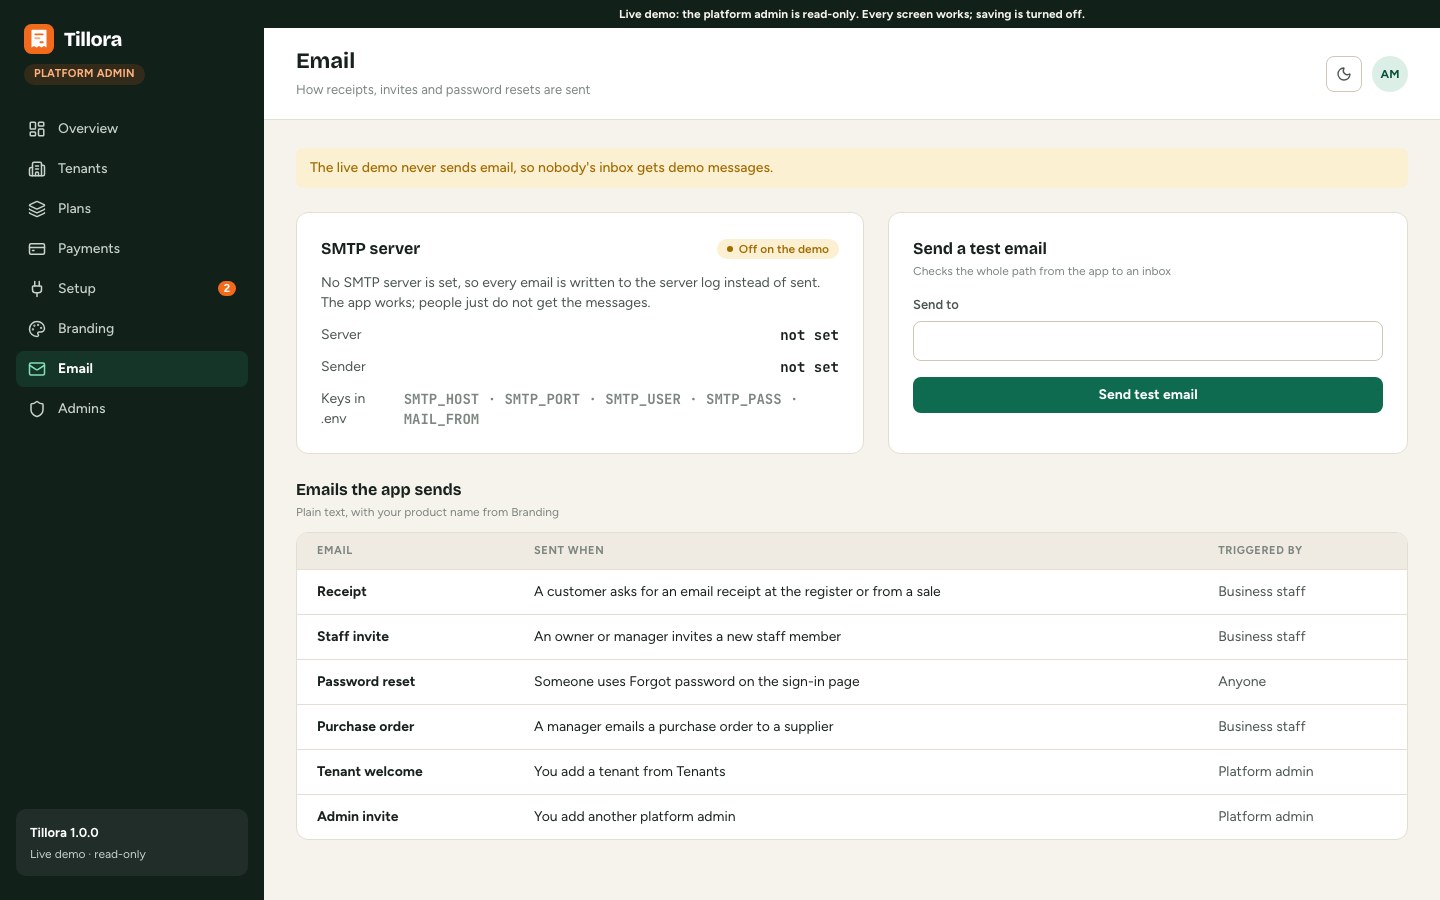
- The platform admin for you: tenants (businesses), plans and limits, payments, setup checks, branding, email and admin accounts.
Built with Next.js 16, React 19, TypeScript, Prisma 7, PostgreSQL and Tailwind CSS 4. Card details never touch your server: plan payments go through Stripe Checkout, and in-store card payments are taken on the shop's own card terminal and recorded in the register.
Screenshots
The main screens, so you know what you are setting up. The names and numbers are sample data; yours replace them.
Register (POS)
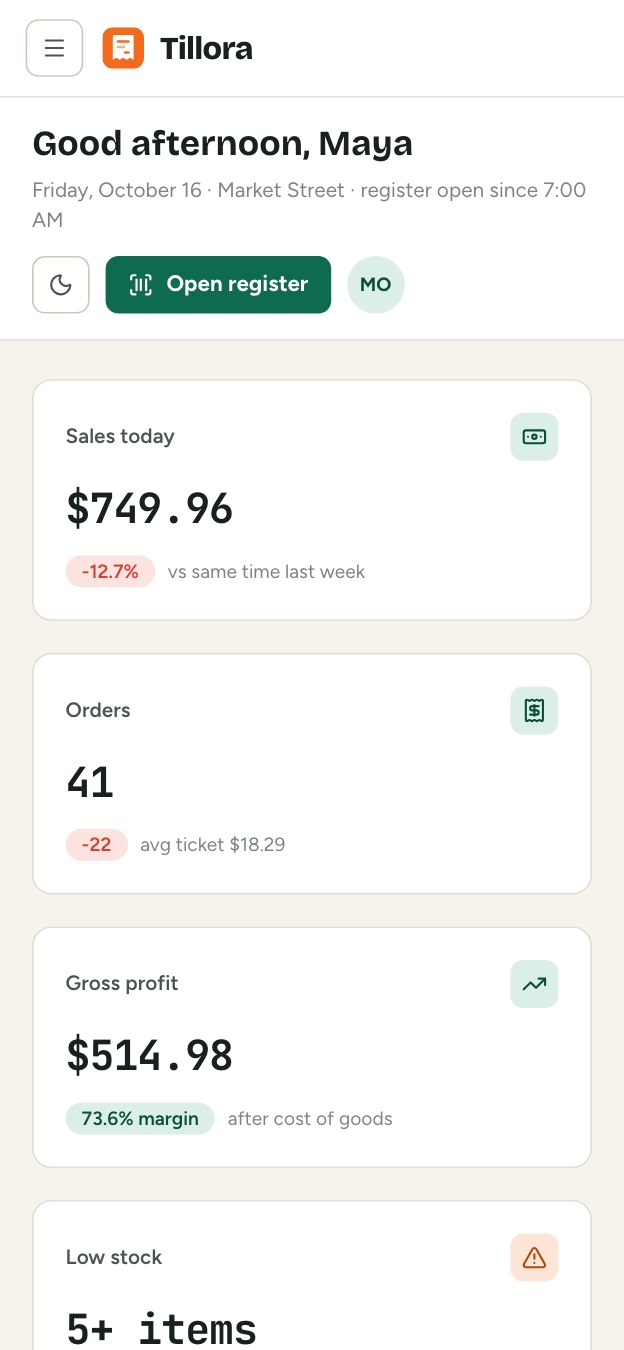
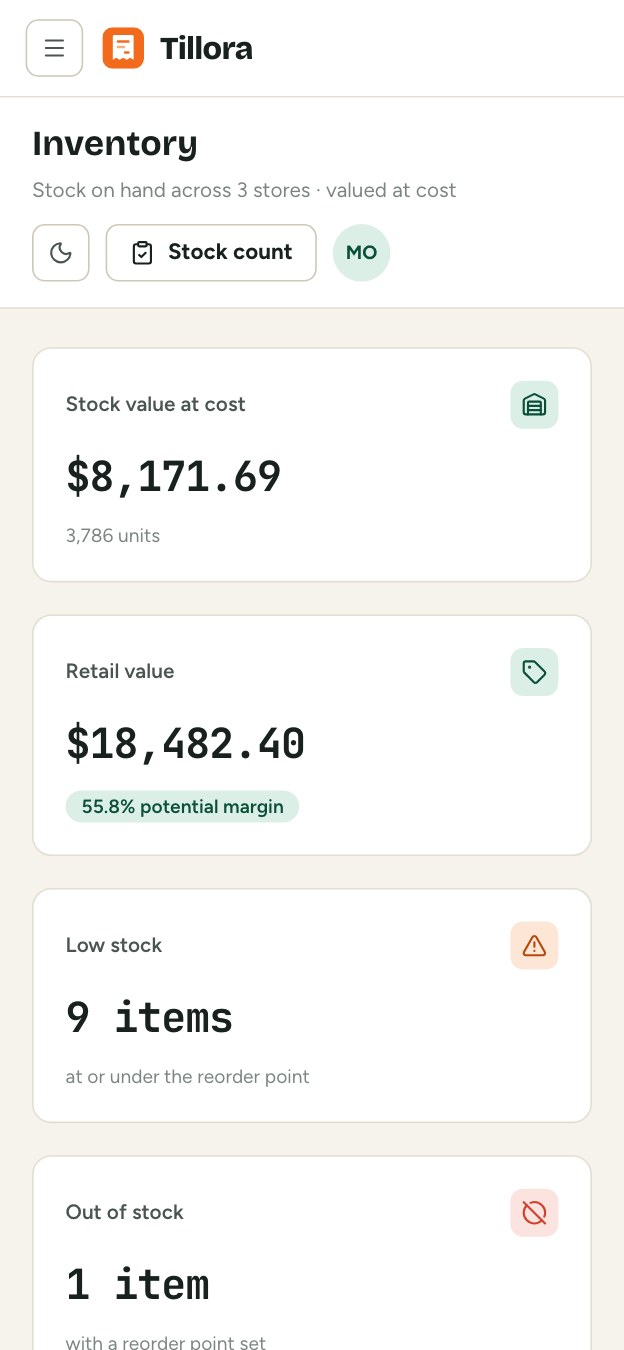
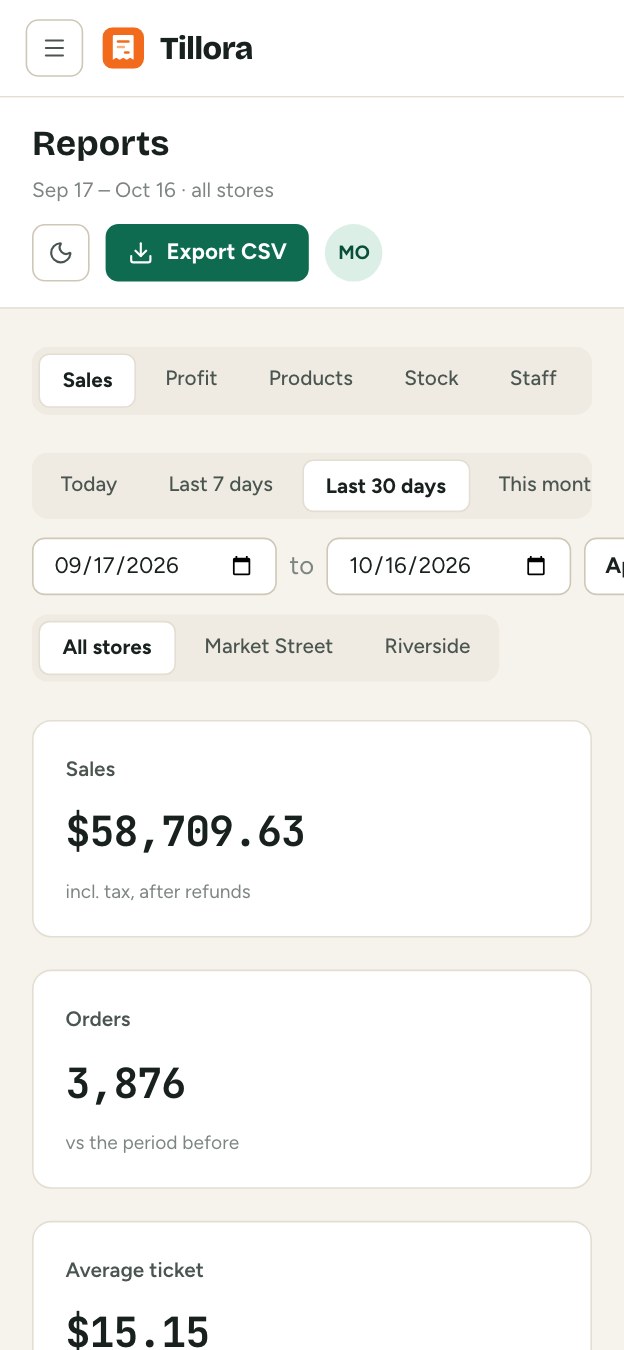
Back office
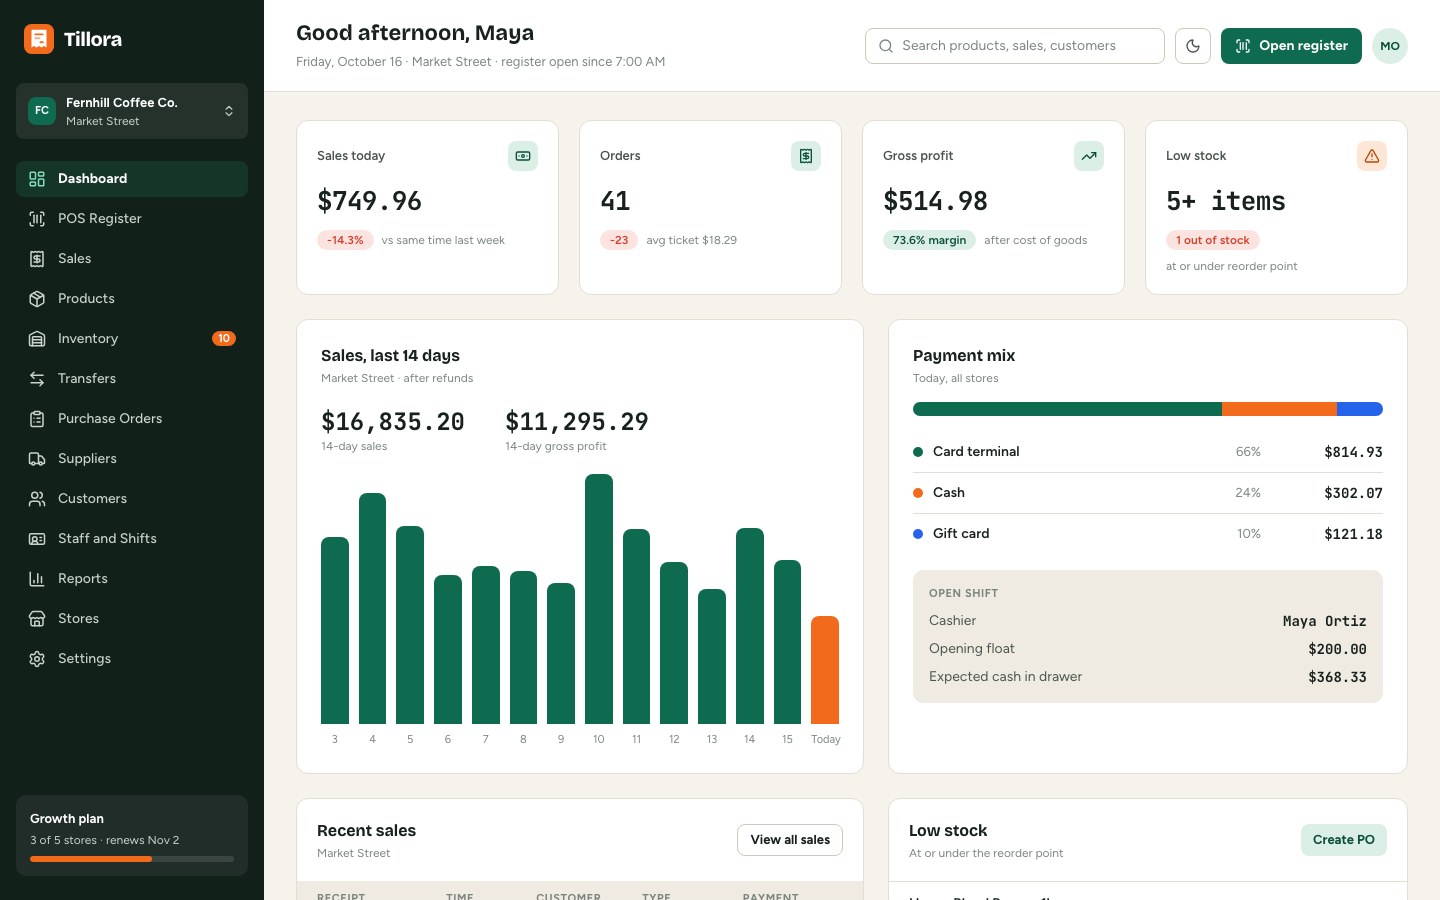
Platform admin
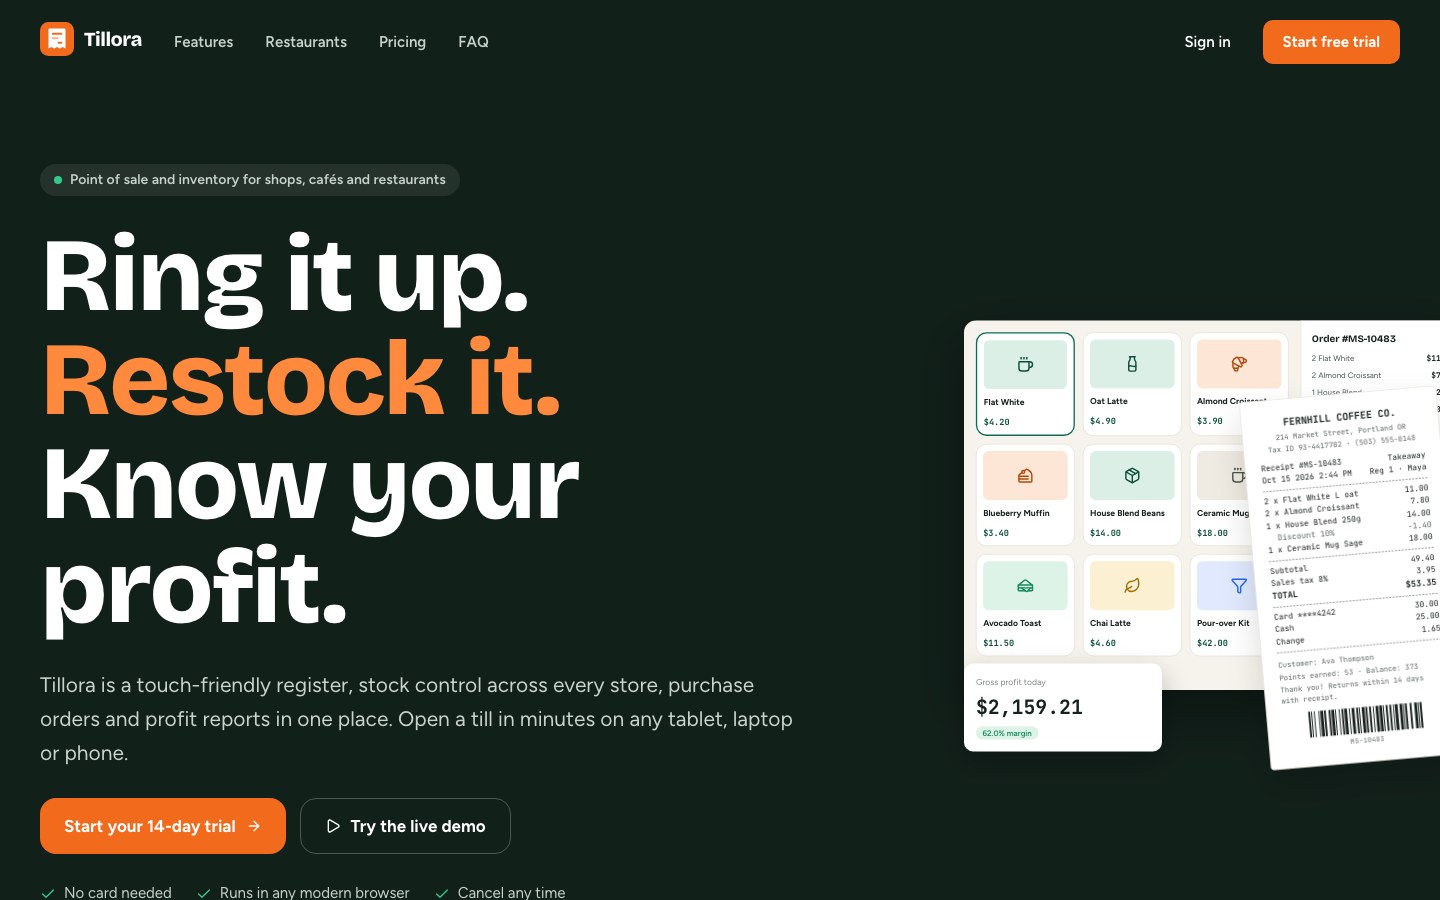
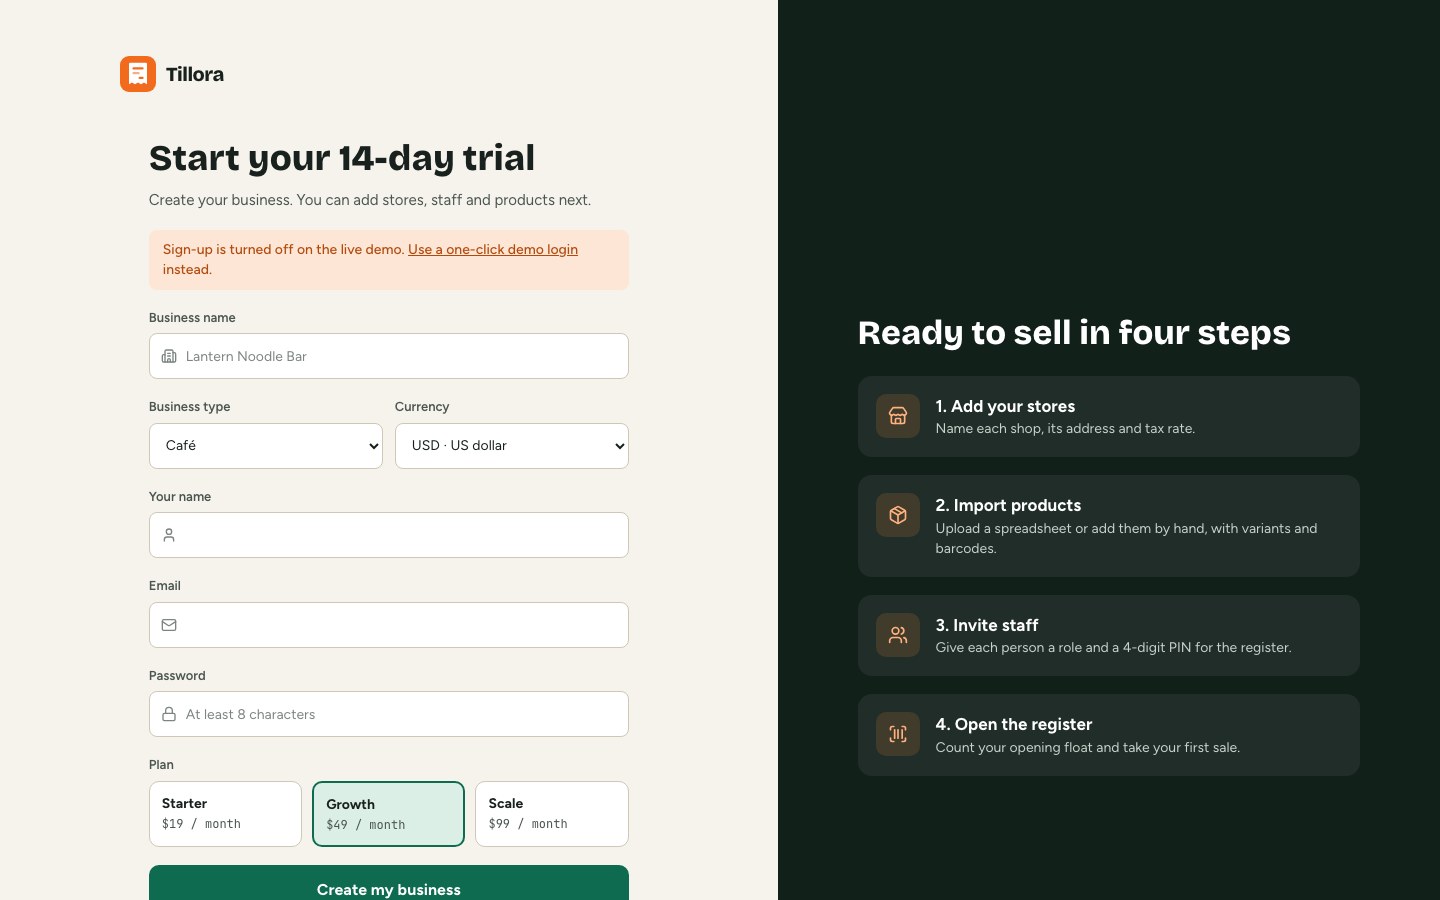
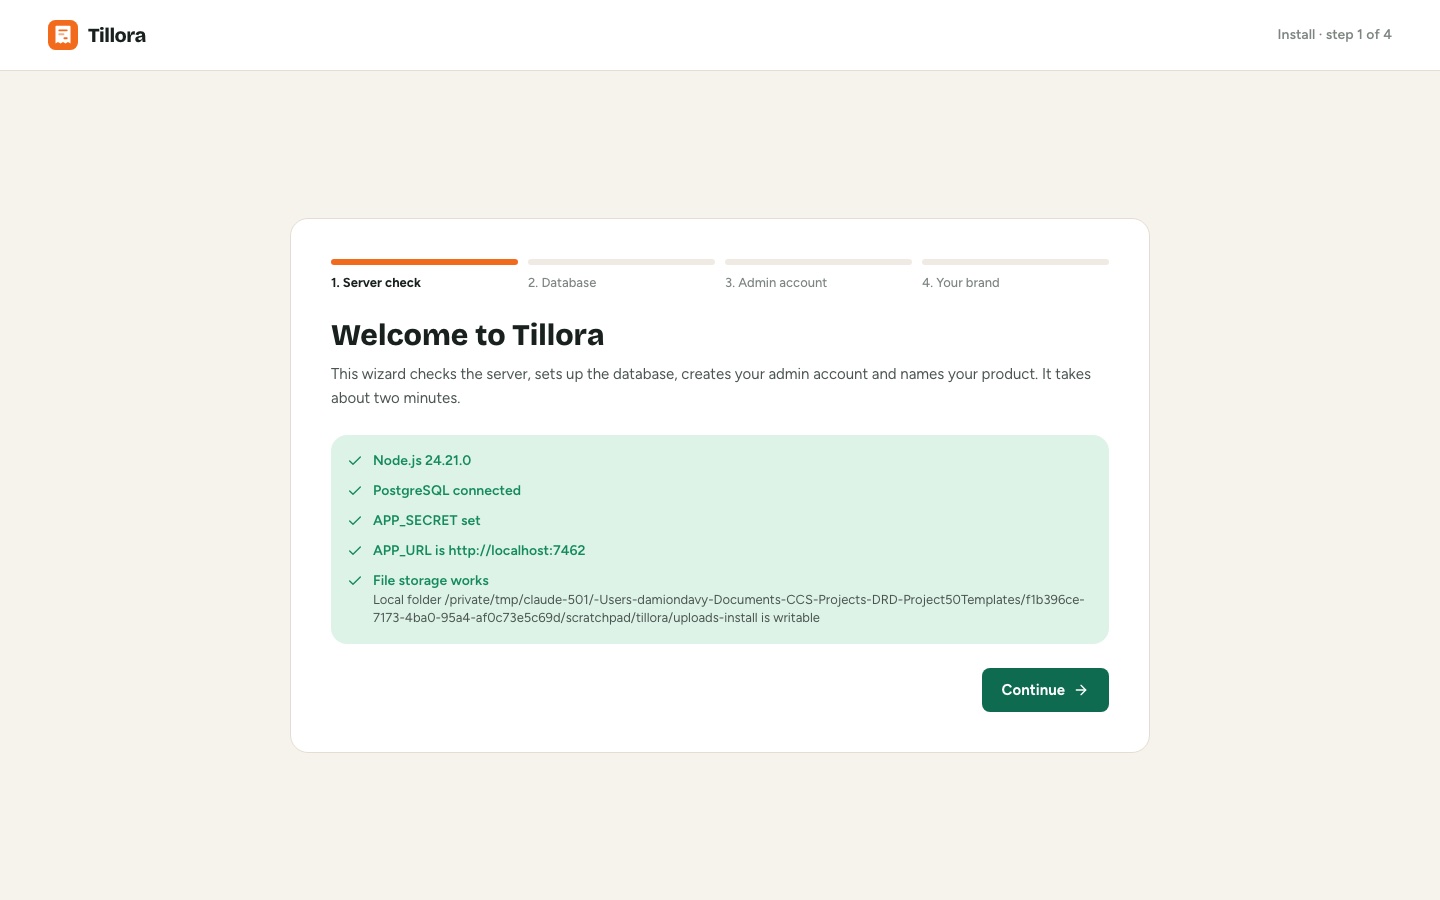
Website and install wizard
2. Requirements
- A server (a VPS from any provider) with Docker and Docker Compose, at least 2 GB of memory and 10 GB of disk. Ubuntu 22.04 or 24.04 works well.
- Or, without Docker: Node.js 20.9 or newer, pnpm, and PostgreSQL 14 or newer.
- A domain name pointing at the server, for HTTPS (needed when you go live; not needed to try it).
- Optional: a Stripe account (businesses pay you for plans), an SMTP mailbox (receipts, invites, password resets), an S3-compatible bucket (photos and logos on object storage instead of the server's disk).
- Browsers: the current Chrome, Edge, Safari and Firefox, on desktop, tablet and phone.
Everything optional has a working default, so Tillora runs completely with only the database: demo payments switch a plan on without charging, emails are written to the server log, and uploads are kept on the server's disk.
Third-party services
- Stripe (optional): plan subscriptions that businesses pay you.
- Any SMTP email provider (optional), for example your host's mailbox, Amazon SES, Postmark, Mailgun or Brevo.
- Any S3-compatible storage (optional), for example Amazon S3, Cloudflare R2 or your own MinIO.
- A server or hosting provider and a domain name registrar of your choice.
Shops take in-store card payments on their own card terminal from their own payment provider. Tillora records those payments; it does not connect to the terminal.
3. Quick start (Docker)
This gets Tillora running on your server in about 15 minutes.
- Install Docker on the server if it is not there yet (Ubuntu):
curl -fsSL https://get.docker.com | sh - Copy the download to the server, for example with
scp tillora-1.0.0.zip root@YOUR_SERVER_IP:, then on the server:apt install -y unzip unzip tillora-1.0.0.zip cd tillora/deploy cp .env.example .env nano .env - In
.env, fill at least these values (the file explains every key; chapter 7 has the full list):Key What to put POSTGRES_PASSWORDA long random password, letters and digits only. Run openssl rand -hex 24to make one.APP_SECRETAnother long random value: openssl rand -hex 32.APP_URLYour website address, e.g. https://pos.your-domain.com, orhttp://YOUR_SERVER_IP:3000for a first test. - Start everything:
The first build takes 5 to 10 minutes (it also downloads the fonts once). On every start the database tables are created or updated and the three starter plans are added if they are missing.docker compose up -d --build - Open
APP_URLin your browser. The install wizard opens (chapter 4). - Check it:
APP_URL/api/healthshows{"ok":true}. Then put it on your domain with HTTPS (chapter 5).
.env? Run docker compose up -d again to restart with the new values. No rebuild is needed.4. Install wizard
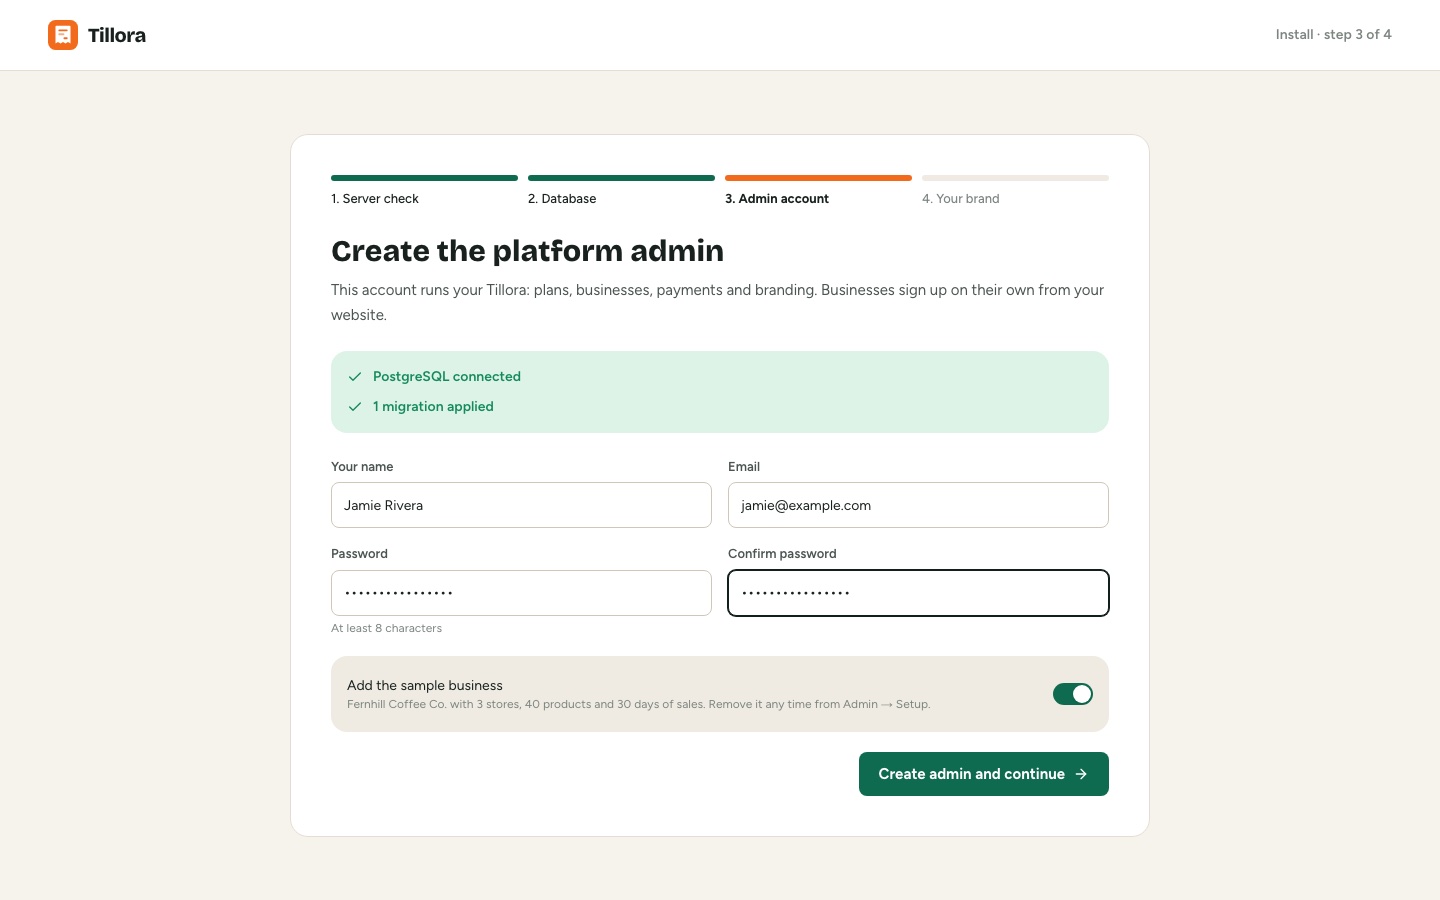
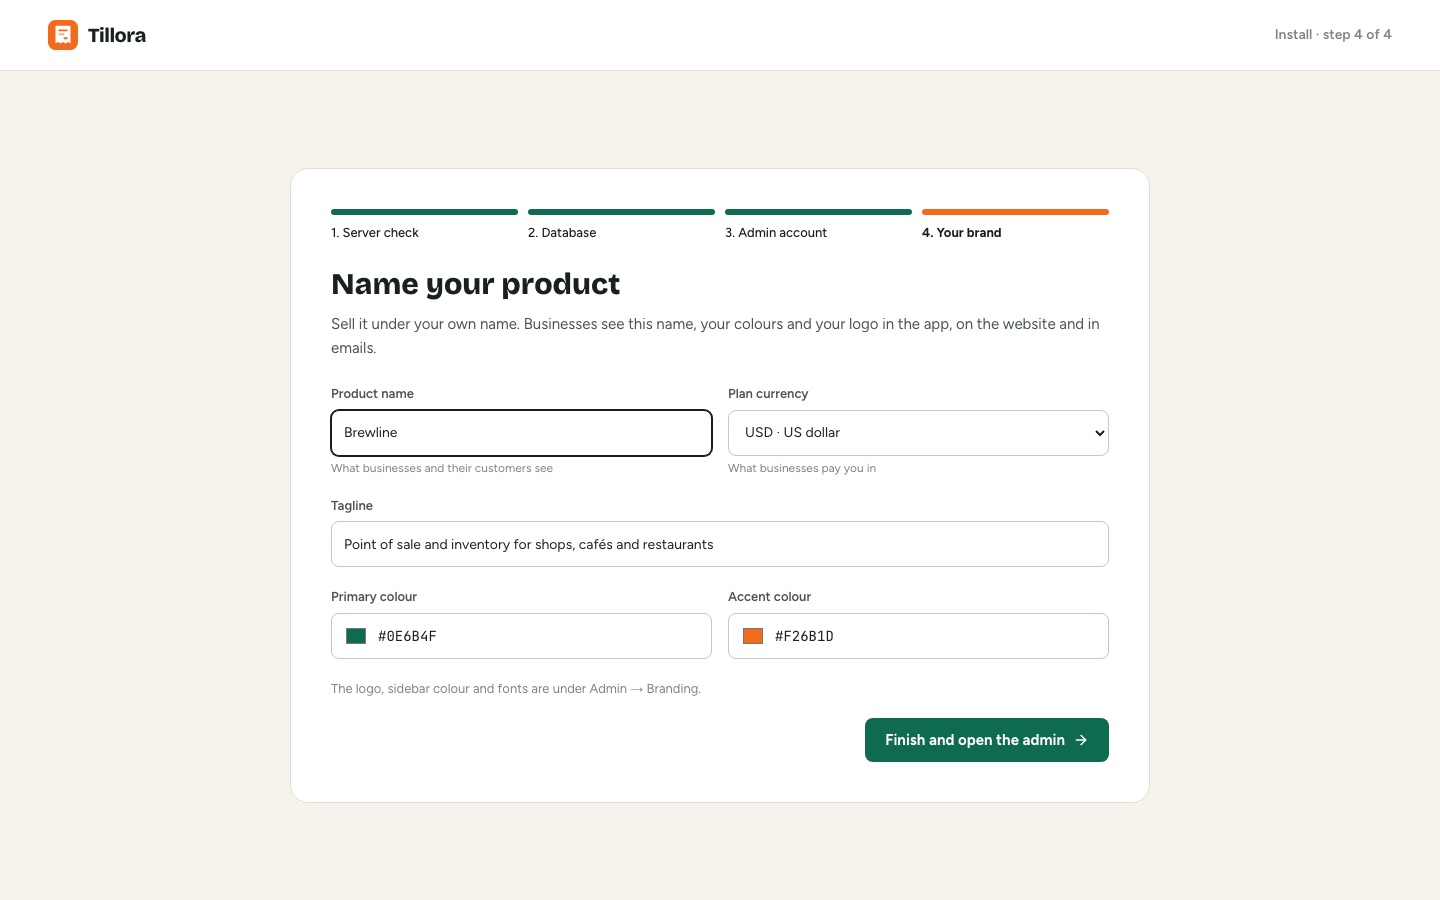
The first visit to your site opens the wizard. It runs until the first platform admin exists, and never again after that.
- Server check: Node.js version, database connection,
APP_SECRET,APP_URLand file storage. Fix anything in red in.env, rundocker compose up -d, and reload. - Database: with Docker the tables already exist. On other hosting the wizard shows the migrations that are missing and runs them with one button.
- Admin account: your name, email and password. Leave Add the sample business on to explore with realistic data (Fernhill Coffee Co.: 3 stores, about 40 products, staff, customers, suppliers and 30 days of sales). Remove it any time under Admin → Setup.
- Your brand: the product name, tagline, colours and the currency businesses pay you in. You can change all of it later under Admin → Branding.
Then you land in the platform admin. Open the sample business from Tenants → sign in (the arrow icon) to see the back office and the register as its owner; sign out to come back to the admin.
5. Put it online (VPS, HTTPS)
Option A: the built-in Caddy (simplest)
- Point your domain (an A record, e.g.
pos.your-domain.com) at the server's IP address. - In
deploy/.envsetDOMAIN=pos.your-domain.comandAPP_URL=https://pos.your-domain.com. - Make sure ports 80 and 443 are open and free, then run:
Caddy gets and renews the HTTPS certificate on its own.docker compose --profile https up -d
Option B: your own reverse proxy
Already run Nginx, Traefik or Caddy? Point it at http://127.0.0.1:3000 (or the port in WEB_PORT) and keep the https profile off. Pass the usual Host and X-Forwarded-* headers. A minimal Nginx site:
server {
  server_name pos.your-domain.com;
  client_max_body_size 5m;
  location / {
    proxy_pass http://127.0.0.1:3000;
    proxy_set_header Host $host;
    proxy_set_header X-Forwarded-For $proxy_add_x_forwarded_for;
    proxy_set_header X-Forwarded-Proto $scheme;
  }
}
6. Other hosting
Without Docker (any Node.js server)
- Create a PostgreSQL database and user.
- In
tillora_web_nextjs:cp .env.example .envand fill inDATABASE_URL,APP_URLandAPP_SECRET. - Install and build:
The app listens on port 3000 (corepack enable pnpm pnpm install pnpm prisma:migrate:deploy pnpm prisma:seed pnpm build pnpm startpnpm start -p 8080for another). Keep it running with systemd or PM2, behind a reverse proxy with HTTPS.
Vercel with a managed PostgreSQL
- Create a PostgreSQL database (Neon, Supabase, Railway, Amazon RDS or similar) and copy its connection string.
- Import
tillora_web_nextjsas a new Vercel project. Set the environment variablesDATABASE_URL,APP_URL(your Vercel or own domain) andAPP_SECRET, plus theS3_*keys: Vercel has no lasting disk, so uploads need a bucket (chapter 11). - Set the build command to
pnpm prisma:migrate:deploy && pnpm prisma:seed && pnpm build, deploy, and open the site to run the install wizard. - Serverless functions open many short database connections: use your provider's pooled connection string, and add
DATABASE_POOL_MAX=3.
7. Every key, explained
Keys live only in .env files, never in the database or the code. deploy/.env is used by Docker; tillora_web_nextjs/.env when you run the app without Docker. "Required" keys must be set; everything else has a working default.
| Key | Required | Used by | What it does |
|---|---|---|---|
| Database | |||
DATABASE_URL | Yes | app .env | PostgreSQL connection string, e.g. postgresql://user:pass@host:5432/tillora |
POSTGRES_DB | Yes | Docker .env | Database the Docker stack creates |
POSTGRES_USER | Yes | Docker .env | Database user for the Docker stack |
POSTGRES_PASSWORD | Yes | Docker .env | Database password for the Docker stack (letters and digits) |
| App | |||
APP_URL | Yes | app .env, Docker .env | Public address of your site without a trailing slash, e.g. https://pos.example.com |
APP_SECRET | Yes | app .env, Docker .env | Long random string; run `openssl rand -hex 32` to make one |
APP_NAME | - | app .env, Docker .env | Product name used before you set one in Admin → Branding |
WEB_PORT | - | Docker .env | Host port the app listens on (default 3000) |
DOMAIN | - | Docker .env | Your domain for automatic HTTPS with `docker compose --profile https up -d` |
DEMO_MODE | - | app .env, Docker .env | Leave empty. "true" only for a public demo (one-click logins, read-only admin, no email) |
| Payments | |||
STRIPE_SECRET_KEY | - | app .env, Docker .env | Stripe secret key (sk_live_… or sk_test_…) for plan subscriptions; empty = demo payments |
STRIPE_WEBHOOK_SECRET | - | app .env, Docker .env | Signing secret of the webhook pointing at <APP_URL>/api/stripe/webhook |
DEMO_PAYMENTS | - | app .env, Docker .env | "false" turns off demo payments while Stripe is not set |
SMTP_HOST | - | app .env, Docker .env | SMTP server for receipts, invites and password resets; empty = written to the log |
SMTP_PORT | - | app .env, Docker .env | 587 (STARTTLS) or 465 (TLS) |
SMTP_USER | - | app .env, Docker .env | SMTP user name |
SMTP_PASS | - | app .env, Docker .env | SMTP password or app password |
SMTP_SECURE | - | app .env, Docker .env | "true" for port 465 |
MAIL_FROM | - | app .env, Docker .env | Sender, e.g. "Tillora <receipts@example.com>" |
| Storage | |||
UPLOAD_DIR | - | app .env | Folder for logos and product photos when no bucket is set (default ./uploads) |
S3_BUCKET | - | app .env, Docker .env | S3 / R2 / MinIO bucket; empty = local folder |
S3_REGION | - | app .env, Docker .env | Bucket region (R2: auto) |
S3_ENDPOINT | - | app .env, Docker .env | Endpoint for R2 or MinIO; empty for AWS |
S3_ACCESS_KEY_ID | - | app .env, Docker .env | Storage access key |
S3_SECRET_ACCESS_KEY | - | app .env, Docker .env | Storage secret key |
8. Setup check
Admin → Setup lists every outside service (database, app URL and secret, Stripe, email, file storage), shows whether it is set, and has a Test button that really connects to it: the database answers, Stripe accepts the key, the SMTP server accepts the login, the bucket is reachable. Key values are never shown, only "set" or "not set".
The same check runs in a terminal: pnpm run doctor (or docker compose run --rm migrate pnpm run doctor). It ends with an error code when a required key is missing, so you can use it in scripts.
The Sample data card adds or removes the Fernhill Coffee Co. sample business. Removing it never touches your own businesses.
9. Plan payments (Stripe)
Businesses pay you for their plan. Until you add Stripe keys, demo payments are on: choosing a plan switches it on at once and records a paid invoice marked "Demo payment", so you can test the whole flow. Set DEMO_PAYMENTS=false to refuse plan purchases until Stripe is set.
- In the Stripe dashboard, open Developers → API keys and copy the secret key (
sk_test_…while testing) intoSTRIPE_SECRET_KEY. - Open Developers → Webhooks → Add endpoint. URL:
APP_URL/api/stripe/webhook. Events:checkout.session.completed,invoice.paid,invoice.payment_failed,customer.subscription.deleted. Copy the signing secret intoSTRIPE_WEBHOOK_SECRET. - Turn on the customer portal in Stripe (Settings → Billing → Customer portal) so owners can change their card and download invoices from Plan and billing.
- Restart (
docker compose up -d) and press Test next to Stripe under Admin → Setup.
Tillora creates the Stripe price for each plan at checkout from the price you set under Admin → Plans. If you prefer your own Stripe products, paste their price IDs (price_…) into the plan. When you go live, swap the test keys for live keys and add a live webhook.
What happens: the first payment arrives as checkout.session.completed and switches the plan on; renewals arrive as invoice.paid; a failed renewal marks the business Past due (it keeps working while you sort it out); a cancelled subscription marks it Cancelled (it can sign in but not sell). Every event is checked against the signing secret and applied only once.
10. Email
Tillora sends receipts, staff invites, password resets, purchase orders to suppliers, and invites for tenants and admins. Fill in SMTP_HOST, SMTP_PORT, SMTP_USER, SMTP_PASS and MAIL_FROM with the values from your email provider (port 587 with STARTTLS, or 465 with SMTP_SECURE=true). Without them, each email is written to the server log (docker compose logs web) so nothing gets lost while you set up.
Use Admin → Email → Send a test email to check the whole path. Most providers need you to verify the sender domain (SPF and DKIM records) before mail reaches inboxes.
11. File storage
Product photos, business logos and your own logo are saved in the uploads Docker volume by default (UPLOAD_DIR outside Docker). To use object storage instead, set S3_BUCKET, S3_REGION, S3_ACCESS_KEY_ID, S3_SECRET_ACCESS_KEY, and for Cloudflare R2 or MinIO also S3_ENDPOINT. The bucket can stay private: files are always served through /api/files/…. Images up to 2 MB in PNG, JPEG or WebP are accepted.
12. Run your platform
Overview
Monthly recurring revenue (yearly plans count one twelfth), active businesses, trials, past-due accounts, a 12-month revenue chart and the newest businesses.
Tenants
Every business with its owner, plan, stores, 30-day sales and what it pays you. Search and filter by status. For each business:
- Sign in as (arrow icon): open its back office as the owner, to help with setup or support. A bar at the top shows you are signed in as them; signing out brings you back.
- Manage (pencil): change the plan, monthly or yearly billing, status (trial, active, past due, cancelled, suspended) and the trial end date.
- Delete (bin): removes the business and all its data, after you type its name.
- Add tenant: creates a business for someone (a sale by phone, a migration) and emails the owner a link to choose a password.
- Export: all tenants as a CSV file.
Plans
Name, monthly and yearly price, trial days, limits (stores, registers, staff, products; empty means unlimited) and features (purchase orders, stock transfers, profit reports). Show on sign-up and pricing hides a plan from new customers without affecting businesses on it; Featured marks the "Most popular" plan on your website. Limits are checked on the server every time something is added, with a friendly upgrade message.
Payments
Every plan invoice from every business, with totals for the last 30 days and this year, and failed payments.
Admins
Add other platform admins (they get an email to choose a password), remove them, and change your own name, email and password.
13. The back office
Each business signs up on your website (Start free trial), gets a trial of its plan, and lands in its own back office. Nothing is shared between businesses.
Roles
| Role | Can |
|---|---|
| Owner | Everything, including plan and billing. |
| Manager | Everything except billing: products, stock, staff, reports, settings, refunds and any discount. |
| Cashier | The register, sales and customers. Discounts up to 10% (more needs a manager). |
| Stock clerk | Products and stock: counts, adjustments, transfers, purchase orders, suppliers. |
Getting a business ready
- Stores: add each shop or warehouse with a 2 to 4 letter code (it starts every receipt number, e.g.
MS-10483) and its number of registers. - Settings: business details, currency and time zone, receipt header and footer, tax rates (tax added on top, or prices that include tax), categories, loyalty points and whether a shift must be open to sell.
- Products: add them one by one (variants such as sizes or colours, each with its own SKU, barcode, price and cost; add-ons such as oat milk or an extra shot; an icon, colour or photo), or Import a CSV file. The first row names the columns;
name,skuandpriceare needed,category,option,variant,barcode,costandstockare optional. Rows with the same name become variants of one product. Export gives the same format back. - Staff: invite people by email with a role, and give each a 4-digit register PIN.
Stock
- Inventory shows stock per store, value at cost, low and out-of-stock items and every movement (sale, refund, count, damage, transfer, purchase). Adjust one item or run a full stock count.
- Transfers move stock between stores: it leaves the source store when sent and arrives when received. If fewer arrive than were sent, the difference is recorded as lost in transit.
- Purchase orders to suppliers: draft, order (and email it to the supplier), receive all or part of it as it arrives, mark it paid. Receiving updates stock and the item's average cost. Reorder low stock drafts orders for everything under its reorder point.
Sales, customers and reports
- Sales: every sale with its receipt. Print it again, email it, or refund some or all items (back to cash or card, putting the stock back if you choose).
- Customers: contact details, visits, total spent and loyalty points (one point per currency unit spent, times the business's multiplier).
- Staff and shifts: every shift with its opening float, expected and counted cash and the difference.
- Reports: sales, profit, products, staff, payments, taxes and stock, for today, the last 7 or 30 days, this month or any dates, per store or all stores. Every report and list exports to CSV.
14. The register (POS)
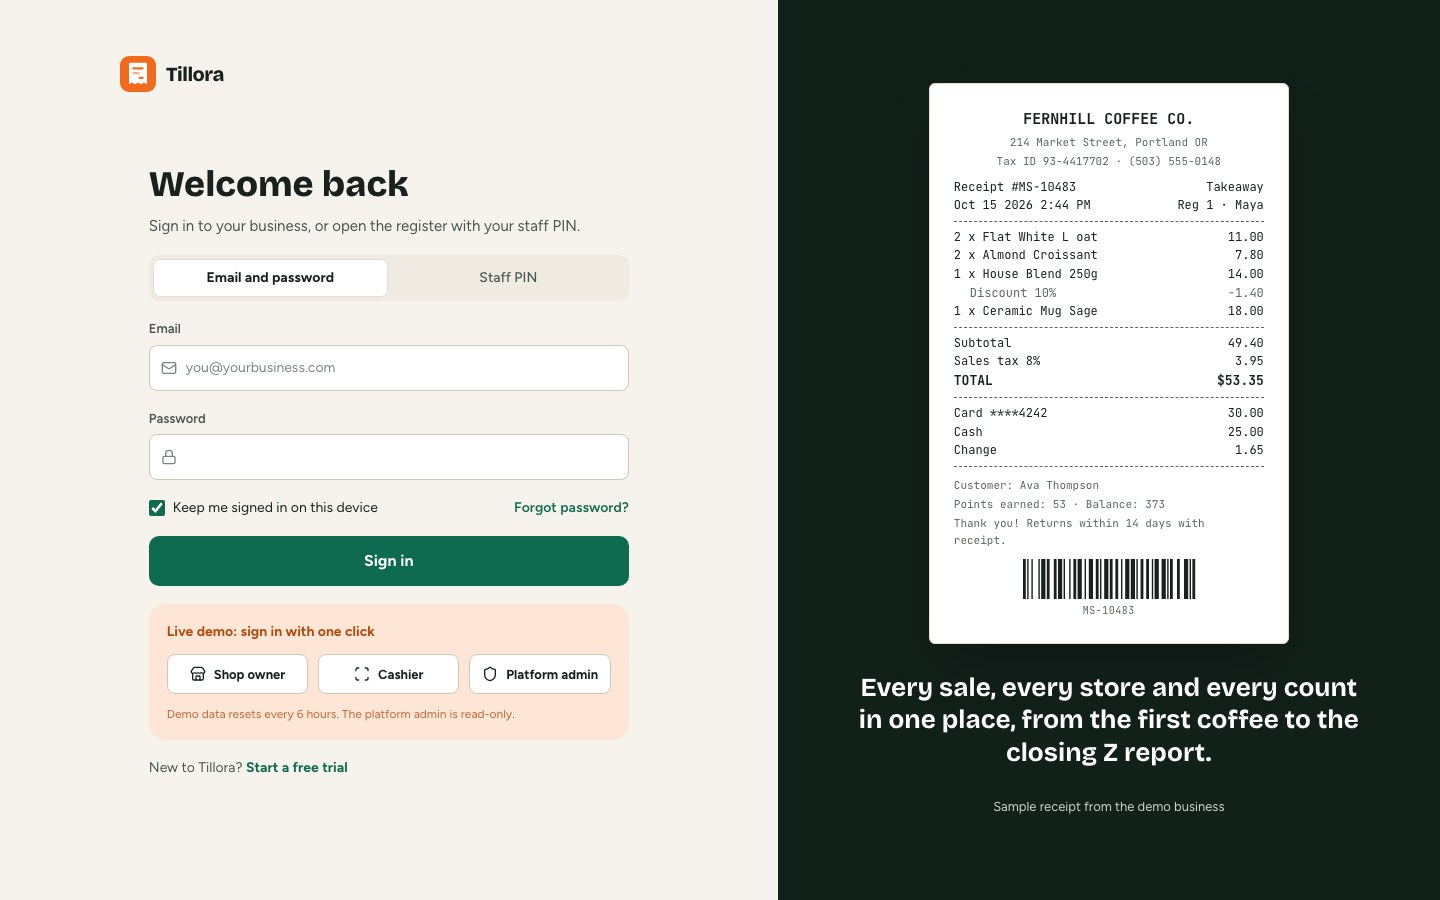
- Sign in with email and password, or with a 4-digit PIN on a till where someone from the business signed in before. Cashiers go straight to the register; Switch cashier lets the next person sign in with their PIN.
- Open the shift: count the cash in the drawer (the opening float).
- Ring up items: tap a product (pick its variant and add-ons), scan a barcode with any USB or Bluetooth scanner, or type a name or SKU in the search field (press
F2to jump there). Custom item adds something that is not in the catalogue. - Change quantities, add a discount or note to a line or the whole order, choose dine-in (with a table number), takeaway or delivery, and attach a customer for points and an email receipt. Hold parks an order to finish later.
- Charge: take cash (with change), card terminal, gift card or other, or split the total across several. Then print the receipt, email it, or skip it.
- At the end of the day, close the shift: count the drawer, see the difference, and print the Z report. Paid-outs (cash taken from the drawer for small purchases) are recorded during the shift.
The server re-prices every sale from the database, checks discounts against the cashier's role and checks the payments, then saves the sale, payments, stock and points together, so the numbers always add up.
15. Receipts and printing
Receipts, kitchen tickets, Z reports and barcode labels open a print page sized for 58 mm or 80 mm receipt paper and use the device's own print dialog, so any printer the device can use works: USB or network receipt printers with their driver, AirPrint, or a normal office printer. In Chrome you can skip the dialog on a dedicated till by starting it with --kiosk-printing.
Labels for shelf prices and barcodes print from Products → Labels. New products can get an in-store EAN-13 barcode (starting with 2) with one click.
16. Rebrand and customise
Admin → Branding changes the product name, tagline, logo and favicon, the primary, accent and sidebar colours (or one of the presets), the heading and body fonts, the support email and the plan currency. Every page, the website and the emails use them at once; no code edits and no rebuild.
Each business sets its own name, logo, receipt header and footer and tax ID in its back office, so receipts carry the shop's details, not yours.
Changing the code
- The website:
src/app/(marketing). The register:src/app/app/pos. The back office:src/app/app/(back). The admin:src/app/admin. - Business rules live in
src/lib/server(sales, inventory, payments, limits) and the shared maths insrc/lib/pricing.ts. - Colours, spacing and type are design tokens in
src/app/globals.css. - The database is described in
src/database/prisma_client/schema.prisma. After changing it, runpnpm prisma:migrate:devto create a migration.
17. Develop and test
cd tillora_web_nextjs
cp .env.example .env          # DATABASE_URL to a local PostgreSQL, APP_SECRET
pnpm install
pnpm prisma:migrate:deploy
pnpm prisma:seed -- --sample  # plans plus the sample business
pnpm dev # http://localhost:3000| Command | What it does |
|---|---|
pnpm lint | Biome lint and format check. |
pnpm typecheck | TypeScript check. |
pnpm test | Unit and database tests (pricing, cart, sales, refunds, stock, transfers, purchase orders, migrations). They use a throwaway schema in the database from DATABASE_URL (or TEST_DATABASE_URL) and remove it afterwards. |
pnpm e2e | Browser smoke tests against a running copy with DEMO_MODE=true and the sample data (set E2E_BASE_URL). Run pnpm exec playwright install chromium once first. |
pnpm run doctor | The setup check in the terminal. |
Demo mode
DEMO_MODE=true is for a public demo of your own: the sign-in page gets one-click logins (owner, cashier, platform admin), the platform admin is read-only, sensitive actions are blocked, sign-up and the install wizard are off, and no email is sent. pnpm demo:reset rebuilds the demo data; run it from cron (for example every 6 hours). Leave it empty on a real install.
18. Updates and backups
Updating
Read the changelog, back up the database, then copy the new files over your copy (keep your .env files and your own changes; a tool such as git makes merging easy). Run docker compose up -d --build: migrations run on start.
Backups
# database
docker compose exec postgres pg_dump -U tillora tillora | gzip > tillora-$(date +%F).sql.gz
# uploads
docker run --rm -v tillora_uploads:/data -v "$PWD":/backup alpine tar czf /backup/uploads-$(date +%F).tgz -C /data .
Restore with gunzip -c file.sql.gz | docker compose exec -T postgres psql -U tillora tillora on an empty database. Keep copies off the server.
19. Troubleshooting and FAQ
The site does not open after docker compose up -d.
Run docker compose ps and docker compose logs migrate web. A failed migrate usually means a wrong POSTGRES_PASSWORD after the database was first created: the password is fixed on the first start. Use the original one, or remove the volume (docker compose down -v, which deletes all data) and start again.
Sign-in works, then I am signed out at once.
APP_URL starts with https:// but you opened the site over plain http: secure cookies are only sent over HTTPS. Use the HTTPS address, or set APP_URL to the http address while testing.
Emails do not arrive.
Check Admin → Email, send a test, and read docker compose logs web. Without SMTP_HOST the emails are only logged. With SMTP set, verify the sender domain with your provider.
A plan payment went through in Stripe but the plan did not change.
The webhook did not reach the app. In Stripe, open the webhook and check the latest attempts: the URL must be APP_URL/api/stripe/webhook on HTTPS, and STRIPE_WEBHOOK_SECRET must be that endpoint's signing secret.
The PIN tab says to sign in with email first.
PIN sign-in works on a device where someone from the business signed in with email before (it remembers the business, not the person). Sign in once with an email account on each till.
"Open your shift before taking a sale".
The business requires an open shift for each cashier. Open it from the register, or turn the rule off under Settings.
Can a business work offline?
No. Tillora runs in the browser and saves every sale on your server straight away, so the till needs an internet connection.
Can I run a single shop without the SaaS part?
Yes. Install it, create your own business from your website or with Add tenant, and hide the other plans. You can keep demo payments on, or set your own business to Active with no trial under Tenants → Manage.
20. Licence and credits
Use of Tillora is covered by your Envato licence (Regular or Extended). Charging end users for access to the product you build with it requires the Extended Licence.
Tillora uses these open-source projects (licences in each package):
- Next.js (MIT), React (MIT), TypeScript (Apache-2.0)
- Prisma (Apache-2.0), node-postgres (MIT)
- Tailwind CSS (MIT), Base UI (MIT), shadcn/ui (MIT), Lucide icons (ISC), Sonner (MIT), next-themes (MIT)
- Zod (MIT), stripe-node (MIT), Nodemailer (MIT-0), AWS SDK for JavaScript (Apache-2.0), JsBarcode (MIT)
- Fonts from Google Fonts, all under the SIL Open Font Licence: Bricolage Grotesque, Space Grotesk, Fraunces, Figtree, Inter, DM Sans and JetBrains Mono. They are downloaded when the app is built and then served from your own server.
No photos are included. The sample products use icons; shops add their own product photos.
21. Changelog
1.0.0 · October 16, 2026
- First release: register (POS) with variants, add-ons, barcodes, discounts, split payments, held orders, dine-in tables, shifts, Z reports, PIN sign-in and printed or emailed receipts.
- Back office: dashboard, sales and refunds, products with variants and CSV import and export, stock per store, counts, transfers, purchase orders, suppliers, customers with loyalty points, staff roles and shifts, reports, stores and settings, tax-exclusive or tax-inclusive prices.
- Platform admin: tenants with sign-in-as, plans and limits, payments, setup checks, branding, email test and admin accounts.
- Stripe subscriptions with demo payments until keys are added; SMTP email; local or S3-compatible storage.
- Docker Compose install with an install wizard, optional HTTPS with Caddy, and guides for other hosting.